Water in the Scrubmaster
There is lots to do for water management:
- Fresh water management
- Filtered fresh water
- Warm water management
- Grey water management
- Black water management
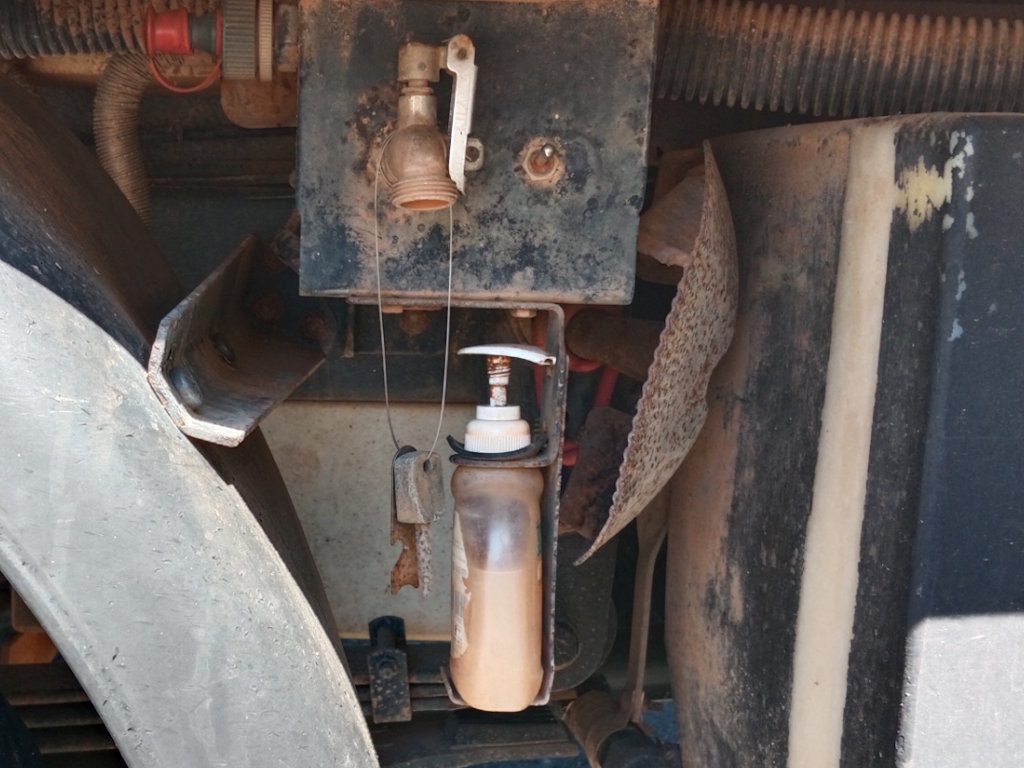
Water fillimg point on RH side (red cap) behind wash tap.
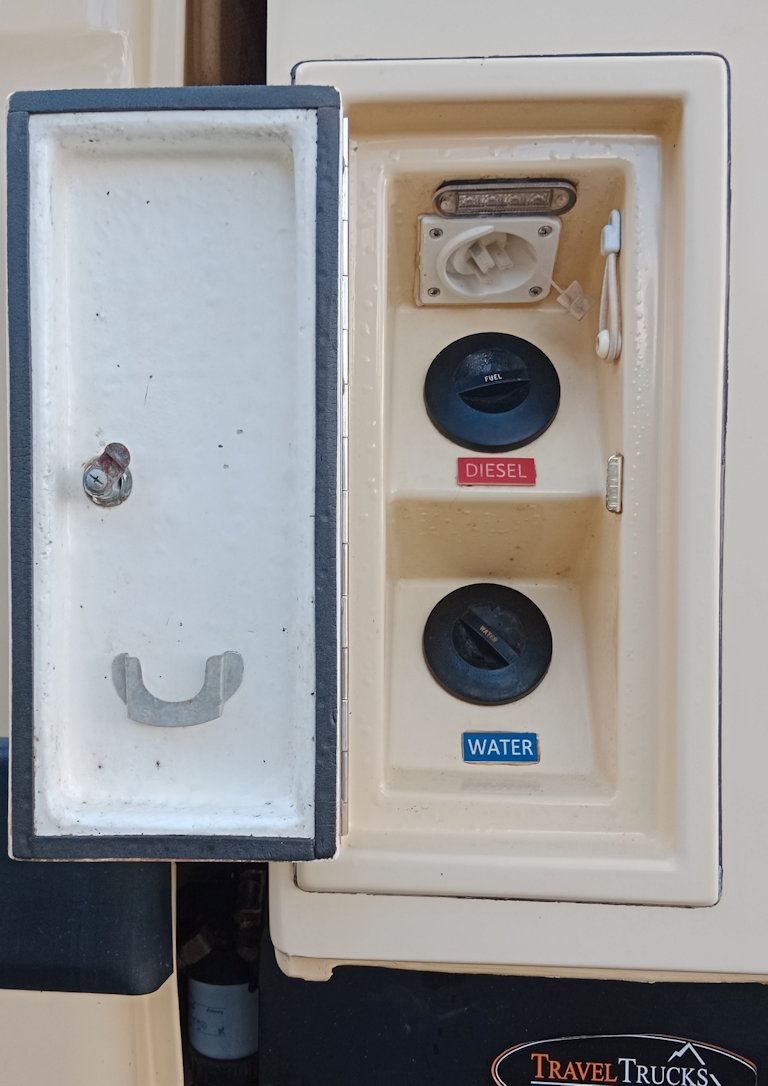
Water fillimg point below diesel filler for the auxiliary tank.
The main filling point for the 185 Litre water tank is in a hatch on the camper wall behind the passenger seat. It is easier to fill by connecting a hose to the snap fitting in front of the RH rear wheel. Be sure to let air out while filling by loosening the main filler cap.
Fresh and filtered water in the Kitchen is described elsewhere, as is fresh water in the Washroom.
Black water management is also mentioned in the Washroom discussion.
Grey Water Management
The Scrubmaster can hold up to 50 litres of grey water – water from the sink and washroom - and can be monitored on the Touch Screen. To empty the tank, the waste water hose is connected to the ball valve behind the auxiliary diesel tank.
Storage of a waste water hose is always an issue. Here this is done by threading it through a length of 50mm draincoil pipe which is, in turn threaded around the vehicle through two of the 64mm chassis tubes. The hose runs from behind the side entrance steps round to the front of the fresh water tank. Rotating the hose as you push it into the draincoil pipe makes for easier stowage. Photos from L to R: behind the entrance steps, behind the LH rear wheel, behind the RH rear wheel, above the auxiliary diesel tank:
Details and Modifications
Fresh Water
Water Reticulation
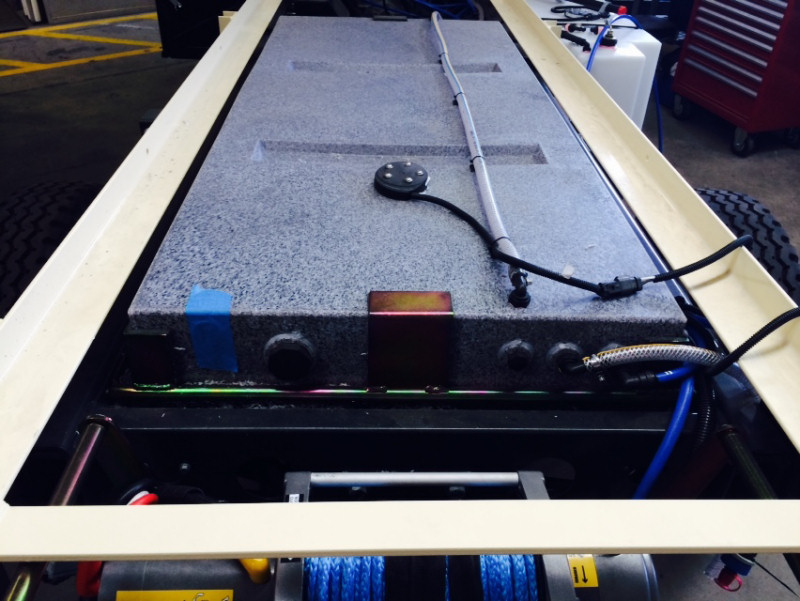
The 185 litre grey fresh water tank is located between the chassis rails.
Left valve: water pumped from tank or external source. Right valve: water pumped to the camper services or to the tank.
Fresh water is pumped from a 185 litre tank that is located between the chassis rails towards the rear of the truck. Alternatively, water can be pumped from a bucket or stream by changing a couple of diverter valves and connecting a hose to a point below the external shower behind the driver's door.
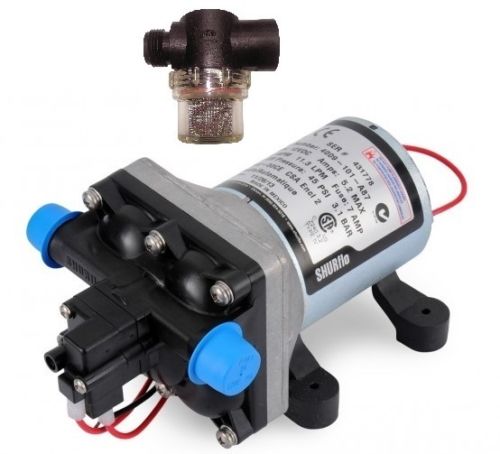
The water pump is a SHURflo 4009-101-A87, rated at 11.3 litres/minute free flow. It can run dry without damage. In the setup of TT30 it delivers (after the mods discussed below) 5.0 litres/minute at the kitchen sink. The pump is fitted with a SHURflo Twist Filter (a stainless steel mesh screen filter) at its inlet. The ports are 1/2"-14 NPSM-Male thread.
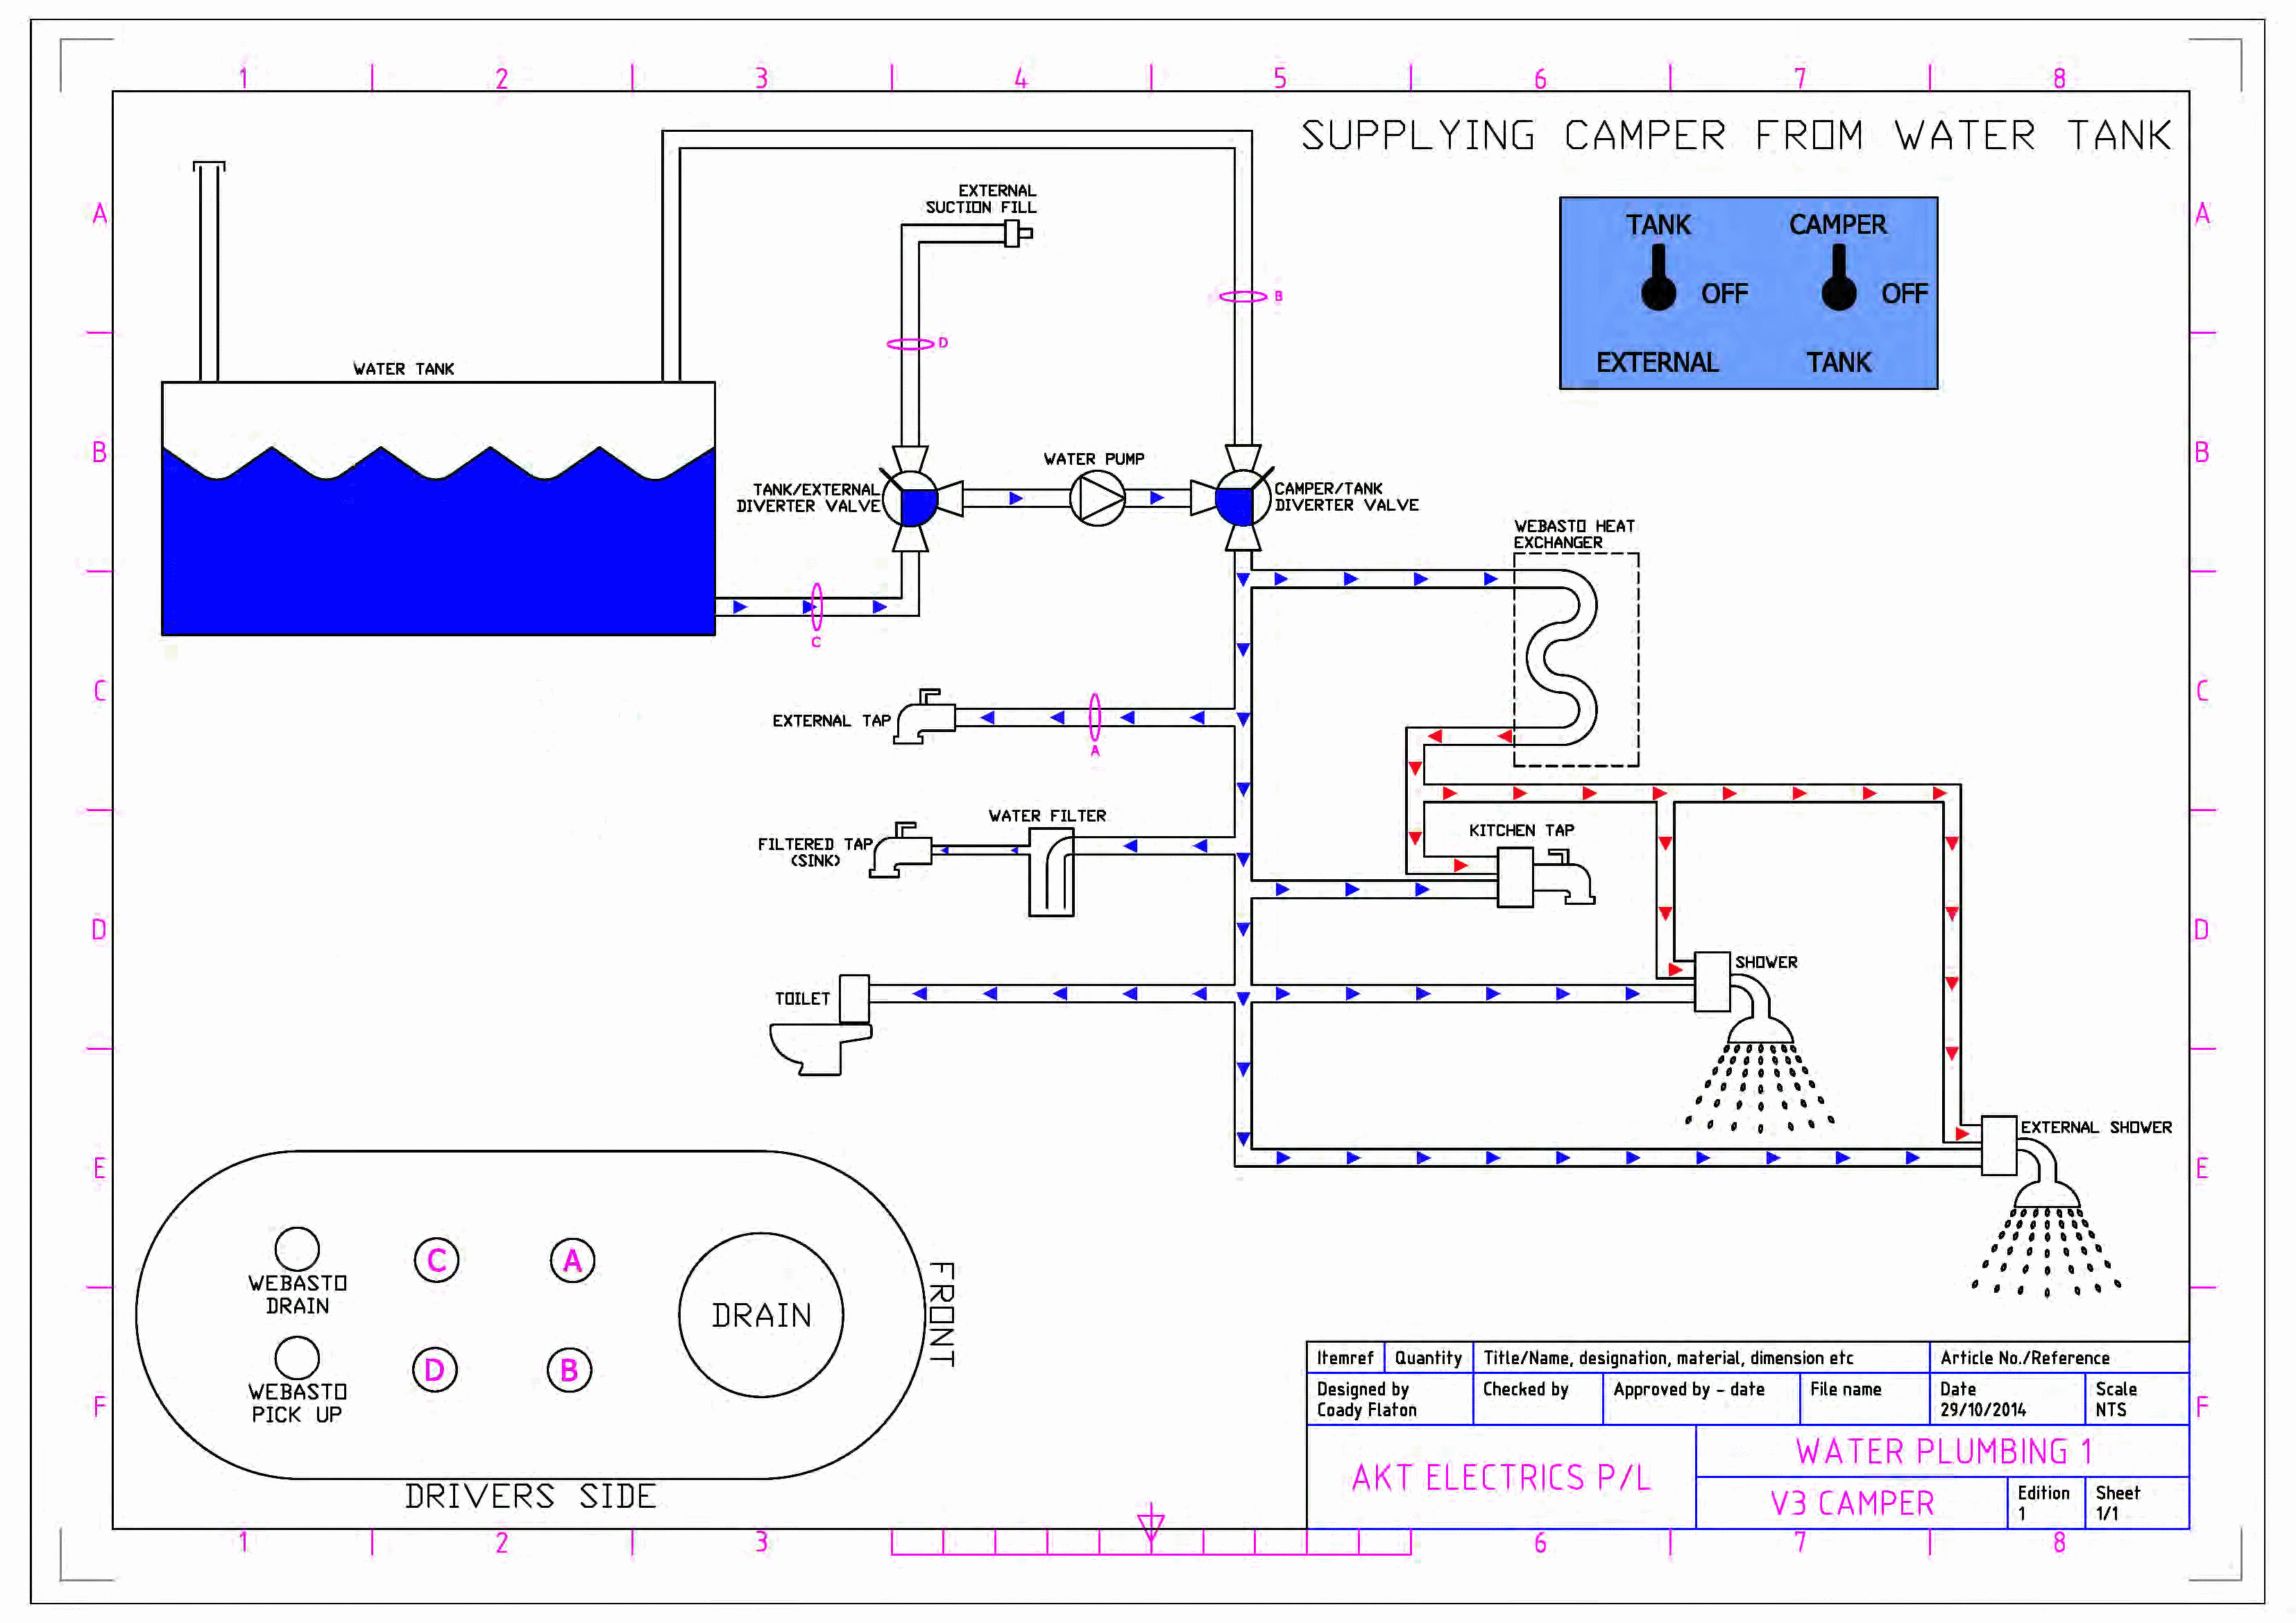
Plumbing Schematic
Courtesy of TravelTrucks (with corrections), this is the schematic for the fresh water management in TT30.
Plumbing
.jpg)
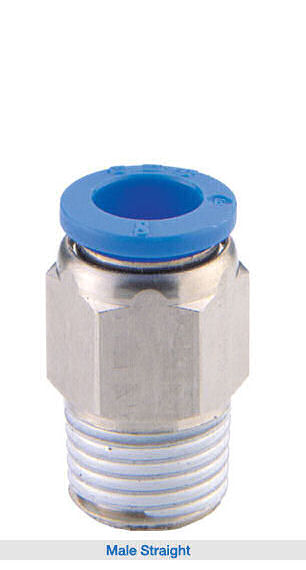
The plumbing is executed in John Guest 12 mm semi-rigid tubing and lots of push-on stem elbow connectors, along with CDC Pneumatics 10 mm thread to push-on connectors for the two Diverter Valves, and a CDC Triple Branch 6-port Connector to distribute the pump output to the different lines.
Some photos of the supplied installation:
Plumbing around the water pump. Pump output at bottom centre - two elbows to blue tube, two more elbows to diverter valve (see next photo). Pump input via strainer under heater air intake, two elbows to diverter valve (see next photo).
Diverter valves. Left, the output of the pump goes to the elbow and centre connector. Right, the input to the pump comes from centre connector and elbow. (Red hot-water plumbing in background.)
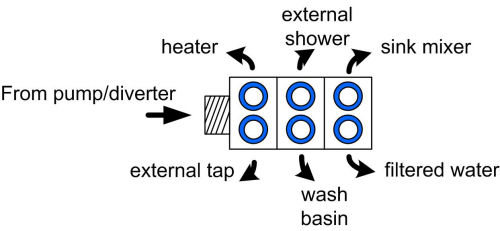
Looking down onto the triple branch 6-port connector. The output from the right diverter valve goes into the end of the connector under the strainer. There is evidence of a lot of swarf in the strainer.
The lines to the Triple Branch 6-port Connector are:
Improvements
The number of elbows that were used is really surprising. And the way the pump was plumbed in was bound to lead to poor performance. The SHURflo installation instructions note that flexible hose should be used on the pump inlet and outlet, and emphasise that restrictions on the inlet and outlet should be minimised. Yet the outlet of the pump immediately went to a 180° turn in two rigid elbows. The inlet was little better, being supplied via two elbows before a length of semi-rigid tubing.
Replacing the lines around the pump with reinforced flexible food-grade hose greatly improved the flow and so pump performance. The increased diameter of the hose gives a 40% increase in cross-section and eliminating 11 (!) elbows reduces restrictions as much as possible. To do better would require replacing the diverter valves and triple-branch distribution port with models that accept larger diameter tube.
The supplied lines between the diverter valves and the pump. Eight elbows were eliminated by replacing these lines with reinforced flexible hose!
Flexible food-grade reinforced 12 mm ID hose connected to the pump inlet and outlet using barbed connectors and up to the diverter valves. The hose is inline with the pump ports for substantial lengths to minimise flow irregularities.
The flexible hoses now go straight into the diverter valves using barbed connectors. The tubing to the tops of the diverters has been replaced with longer lengths, allowing the elimination of three elbows!
White plastic swarf and black plastic particles trapped in the pump strainer.
Removing Blockage
Before these changes were made, there had been a notable but unappreciated fall-off of performance of the system such that the flow rate measured at the sink was an unacceptable 2 litres/minute. The changes described in fact had little impact on this performance. At first I thought the rubbish I had found in the pump strainer was the explanation. It looks like plastic swarf from cutting the threads in the sockets in the tank wall. However this explained none of the performance drop.
Plastic swarf blocked the tube from the tank and elbow below the camper floor.
By a process of eliminating different parts of the water intake path, I established that:
- the input diverter valve made little difference to the performance of the system,
- the big performance hit was due to the hose/elbow below the floor of the camper.
Pulling the joint apart, I found that the elbow and the end of the pipe to it were jammed full of white plastic swarf. Clearing this out doubled the flow performance!
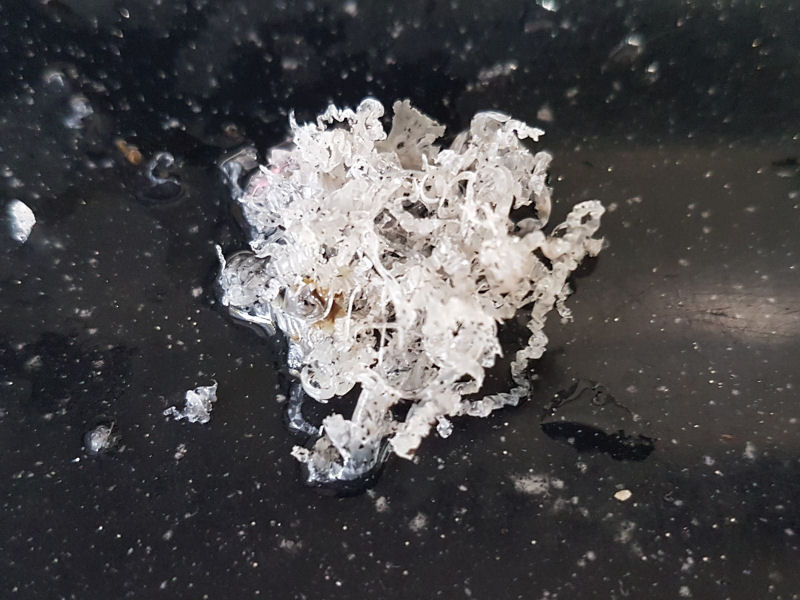
While replacing the filtered water cassette a couple of years later, I looked in the pump strainer. I was shocked to see that it was again full of white plastic swarf. I hope that's the last of it!
Main Water Filler
Filling the water tank with a hose. A special hose bag is used for storage.

Water filling point with the cap holder on the door.
The main filling point for the 185 Litre water tank is in a hatch on the camper wall behind the passenger seat. The water entry cap was kept in place with a chain. This meant that a hose nossel could not be firmly inserted to fill under pressure. The chain has been removed and a cap holder fashioned for the hatch door.
The filling point is rather low and was connected to the entry point at the back of the tank using 25 mm dia. suction hose. Inadequate care to ensure the hose has a downward fall meant that it was difficult to fill the tank from that point. A second snap-lock hose connector is set just in front of the RH rear tyre of the vehicle and this can be used to fill the tank under pressure.
The original prototype Camper used 38 mm dia. hose, a far better idea. Even better would have been to connect the hose to the front of the tank, not the back!
As much as possible, I have replaced the filling hose with 38 mm dia suction hose taking care to ensure a fall for the full length. There is a 38 mm threaded entry at the back of the tank that was not being used. The only issue is the set of 25 mm dia elbows that take the hose through the camper floor.
The changes work well — the tank can be filled successfully from the filling point using a garden hose but admittedly it is still better to use the snap-lock hose connector in front of the RH rear tyre.
Behind the filling point. 38 mm dia. suction hose ...
... snakes its way to the 25 mm dia. elbow through the floor.
Another 25 mm dia. elbow and a long length of 38 mm dia hose.
Hose over the chassis rail near the back wheel — a downward slope all the way.
At the rear, barbed elbows to the tank filler point.
At the 38 mm dia entry to the tank, slip joiners are required since there is no room to do up a threaded elbow.
Tank Drain
A convenient drain cock for the water tank is handy. I replaced the 25 mm dia. bung in the bottom of the tank with an elbow and tap sitting above the rear axle. A rubber guard was later added in front of the elbow to protect against kicked-up rocks and branches.
No Water!
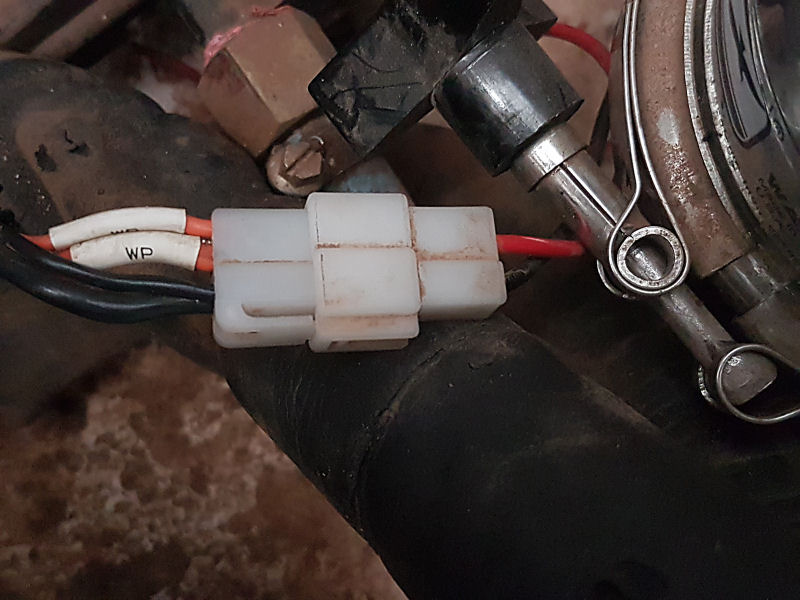
The problematic power connector for the water pump. Crimps on left failed.
Two and a half years after delivery, the water pump stopped working. Various checks led me to examine the electrical connector near the pump itself. A gentle pull on the wires, and both black and red supply cable sets came out of the connector leaving the crimp inserts in place! Two wires, both labelled "WP" but of very different diameters, go to each crimp insert. The crimping had failed, possibly due to vibration and because the crimp could not handle the different wire diameters adequately.
I removed the inserts using a narrow cable tie to release the locking tags, recrimped the wires as best I could, soldered them in place and reassembled the connector. All good.
LINKS
