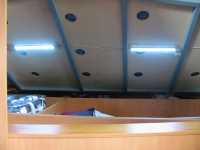
LED Lights in the Applause
To help reduce electrical consumption to allow longer bush camping and the use of all the other power-hungry essentials, I have replaced all the house lights (6 x 10 W halogen G4), the lights in the shower room (2 x 10 W halogen G4) and the light in the rangehood (1 x 20 W MR16).
But I have ADDED lights in each of the overhead cupboards and elsewhere.
House Lights replacements
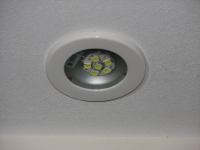
From The LED Shop Australia I bought LED HP G4 Daylight White and Warm White types. These have internal current regulators for 8-30 Volt and are bipolar. They seem a very good replacement for the 10 Watt G4 halogens, with current consumption per light dropping from ~1 Amp to ~0.1 Amp and plenty of light.
The house lights are all Daylight White and the shower room lights are Warm White.
Range Hood Light replacement
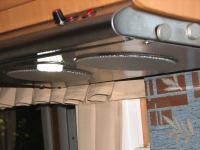
From the same source, I have replaced the MR16 20 Watt halogen in the Range Hood with a 36 discrete LED Cool White (3 Watt) type. This is also current regulated for 8-30 Volt and looks good.
Overhead Cupboard lights
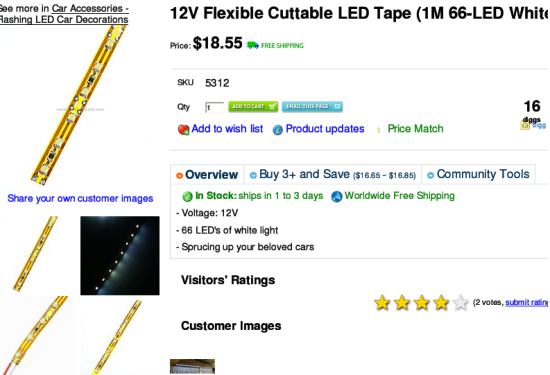
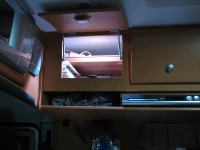
The overhead cupboards were rather dark to see into. Not now. DealExtreme item SKU 5312 is a cuttable 1 m LED tape of 60 SMT white LEDs in groups of 3.
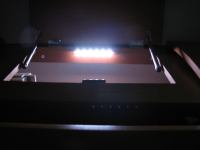
Strips of six LEDs were cut from the LED tape and mounted in six of the cupboards, and strips of nine were mounted in the higher-usage cupboards 7 and 8 (counting clockwise from driver's seat). The LED strips come backed with 3M double-sided tape so, after soldering ribbon cable to a strip I stuck it in the ceiling of the cupboard immediately behind the upward hinged door so it is not in a direct line of sight.
The lights are activated by a normally-closed switch mounted in the cupboard front near a door hinge. When the door is opened, the switch closes and power is supplied to the LED strip in the cupboard ceiling. Each cupboard light draws ~40 mA (0.5 W) - not much.

Light for Cabinet under Cooktop
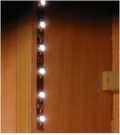
The cabinet under the Cramer cooktop is used to hold food supplies. With its new LED strip light of six LEDs it is now easier to see into. A normally-closed switch is mounted in the cabinet front in the same way as for the overhead cupboards.
There was no convenient electrical supply for the light. So a new cable was run from the Elektroblock. Block 6 Pins 8 (+) and 5 (-), unused Circuit 1/4, and not switched via the control and switch panel for the Elektroblock, was utilised.
Table light
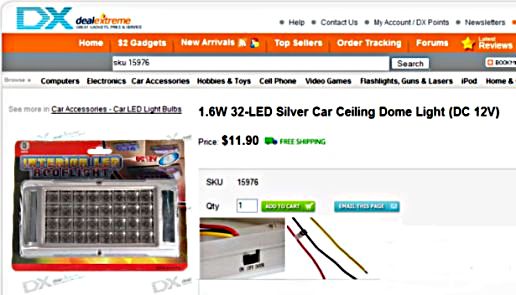
A light directly over the table that does not cause glare is a new addition. DealExtreme Item SKU 15976 is a 36 LED roof light that has each LED recessed in a mini reflector. It has a two-position switch on the side that, with a bit of rewiring now turns on all three banks of LEDs for full brightness or only one end bank for subdued lighting.
Internally, the light consists of 3 banks of 4 strings of a 200 Ω resistor and three LEDs in series. At 12.7 V the current through a string of three LEDs is 16.5 mA (3.1 V drop each), which should be OK.
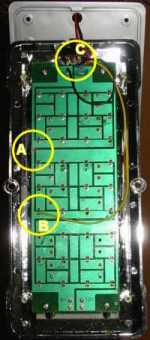

To make the switch select 1/3 or full brightness, cut the circuit board track at A, solder a new wire at B and solder this wire and two others to the switch at C as per the wiring diagram.
The first of these lights developed a dead string of three LEDs and I replaced the unit with another which worked for many months without incident. Eventually two strings died, and a third began to flicker when the voltage was greater than 13.2 V. An individual LED was abnormally bright at low voltage. Using LEDs from the first fixture, I replaced the dead and flickering LED strings. In each case one LED was faulty. I also replaced the abnormal LED with a known good one.
I have had to do these repairs several times; a series resistor of 3.3 Ohm is now in place and I hope this eliminates the failures, which are always a string of three LEDs flickering.
Awning light
The awning light had a 20 W (1.6 A) bulb; I initially replacing this with a 28-LED block from DealExtreme reducing the power consumption to 1.9 W (150 mA). However, these blocks are not good quality and over several months groups of three LEDs began to flash and/or fail completely.

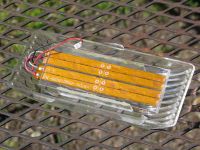
I have replaced the DX block with 3 x two groups of three triple-emitter LED strips cut from a tape supplied by Sure Electronics, wired in parallel and stuck onto a piece of acrylic plastic that replaces the DealExtreme block. The LED tape is similar to that used for lighting in the overhead cupboards but since the LEDs are triple-emitters, they are MUCH brighter.

For best results, the LED strips are wired directly in place of the bayonet fitting. The acrylic mounting plate sits on two strips of plastic (25 mm at top edge and 10 mm at bottom edge) which are glued directly to the lens of the awning fitting using 5 minute Araldite. The result is that the seriously bright light is angled down to the ground about 2–3 m away, giving a good footprint that should also not cause annoyance to other campers from the intense beam.
Having twice left the awning light on overnight without realising it, I have replaced the light switch mechanism with one that has an LED indicator built into it. The switch mechanism is a Clipsal neon SPST 240 V type no longer available, but similar to the 30/1NM (p41). I replaced the neon and ballast resistor with a high-brightness red LED and 1.2 kΩ resistor. A new negative wire comes from the fridge control panel next to the switch plate.

Rear Door Light

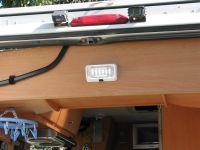
I added an outside light to the back of the overhead cupboards at the back door. This helps with working there at night. Since the Elektro- block had an unused dedicated awning light circuit, circuit 5: pins 9(+) and 3(-) on Block 6 I wired the light to that, via the rear door pin switch that, pre-conversion to an A'van, controlled a rear light. That way, closing the door turns the light off no matter what.
A pic shows the wiring for the light, at the back of Cupboard 5. It then goes down the driver's side rear roof pillar to the light pin switch and to Block 6 on the Elektroblock.

As for case of the Awning Light, I initially replaced the 20 W bulb in the light fitting with a 28-LED block from DealExtreme. Now, I am using the 2 x two groups of three triple-emitter LED strips remaining from the tape supplied by Sure Electronics used for the Awning Light.
Under Bed Storage light

There is a lot of storage room under the bed. A light helps here. DealExtreme's 30 LED bar is a very bright and robust encapsulated strip of LEDs. Cutting it into two equal parts gives lights to mount under the bed so that the whole of the storage space is lit. Then with a bit of scraping to expose the circuit tracks that run along the inner edges of the strip, I soldered supply wires to the second strip, and glued the two strips to the bed base using contact adhesive.

I was not convinced that the LED bars would operate safely at charging voltages so I have added a 5.6 Ω 1 W resistor in series with the positive wire. To activate the lights, an automotive pin switch (the same as used to warn that the extending solar panel is out) is set up to be compressed and so turned off when the bed base is down. In case the bed base needs to be left up for an extended period, an override switch is also installed. I use the same electrical supply as used for the under-cooktop cabinet light.
Cab Strip-Light
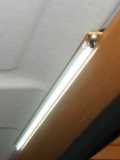
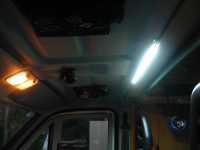
The Ducato cab lights are too dull for much. The solution is a 48-LED strip from DealExtreme stuck with double-sided tape to a thin wood strip that slots into the rear cab ceiling dividing panel. Add an operating switch and wire into the supply in the Technical Cupboard (cupboard 8) and job done.
The light is directly overhead the main seats and provides excellent illumination in the cab and seat occupants.
Net Energy Saving
With all house lights on and one or two cupboard doors open, power consumption has dropped from a max of 6.2 A to a max of 1.5 A.
LINKS
- A'van http://www.avan.com.au
- The LED Shop Australia http://www.ledshoponline.com
- Deal Extreme http://www.dx.com
- Dick Smith Electronics http://www.dse.com.au
- Sure Electronics http://www.sureelectronics.net
LEDs in the Applause
One of the house LED down-lights.
The LED light in the Range Hood
One of the overhead cupboards with door open.
Showing where the light switch is positioned.
The 6-LED light strip turned on.
Installation of 6-LED strip and press button switch in cabinet front near the door hinges.
Switchable light over the table - full or 1/3 intensity.

Original awning light with 20 W bayonet bulb.
LED awning light on. The three LED strips are angled down to give a good local footprint.
Two LED strips on an acrylic plate in the lens for the rear door light.
Rear door light on the upper cupboards at the back of the A'van.
2 x 15-LED bars light the under-bed storage area. A pin switch controls the lights.
Cab strip light brightness compared with the original ceiling light.


