Wheels and Tyres
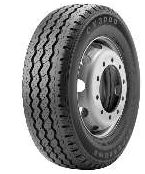
The original tyres fitted to the Ducato are Firestone CV3000, 215/75R16C DOT:0106 made in Spain, on 6Jx16H2 rims. These light truck tyres are rated for a maximum load of 1150 kg at 475 kPa/69 psi (Load Index of 113). Fiat's recommended pressures are 450 kPa/65 psi all round. At this pressure the ride is quite harsh.
Given the axle weights and tyre size, information received (members of CMCA only) proposed my current practice of running front tyres at 55 psi (could be lower: 50 psi has been suggested) and rear tyres at 60 psi. The ride is much smoother. On severe corrugations or sand, a pressure reduction of 30% can be used, keeping a vehicle speed under 80 kph.
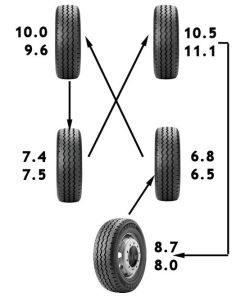
Following the three year vehicle service at an odometer reading of 34,000 km, I have rotated the wheels for the second time. Fiat recommends a rear-front swap, not crossing over the tyres from one side to the other. However, Bridgestone recommend a crossover tyre rotation and this is what I am using. The figure shows the rotation pattern being used; the numbers are the measured tread depth after rotation. The upper number is the depth at the outer groove, the lower number is for the inner groove.
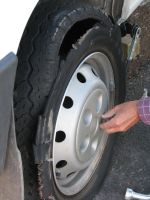
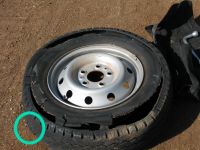
Update 1, Apr09: I experienced a blowout on 9 April 2009 while on a highway travelling at ~95 kph. Looking at the totally destroyed tyre, it appears that the tread delaminated in parts (felt like going over corrugations), started to deflate and then rapidly overheated and exploded.
My first hypothesis, supported by a tyre expert, is that delamination may have been due to severe concussion shocks while on rough roads with tyres at too high a pressure, even though the actual pressures were as recommended.
But a second hypothesis seems more likely in hindsight. In the first year of ownership, on two occasions I have gone to the Ducato only to see a rear tyre deflating or near-flat while sitting in the driveway. In both cases the cause was cracks in the valve stem close to the rim. These stems were evidently faulty, or have been exposed to high levels of ozone which has attacked the rubber. So what has probably happened to the tyre that blew up is that even though the tyre pressure was checked the day before, the stem has started to leak air, deflating the tyre which then overheated and self-destructed. I still have two of the original valve stems on wheels. I have checked them for cracks and they appear sound.
The destroyed tyre has been replaced by another Firestone CV3000.
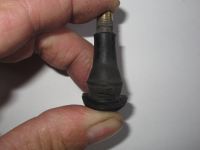
Update 2: At 47,000 km I have had ANOTHER case of a valve stem giving way. Fortunately in the driveway. I think there is only one of the original stems left (but I don't know which one, off hand). I have had reports from Ducato owners that this is a known issue with the batch around 2006. Another issue is that it is said the push-in type valve stems are only rated to around 65 psi. And that metal caps, rather than plastic ones, should be used to retain the high pressure air in case of a valve failure.
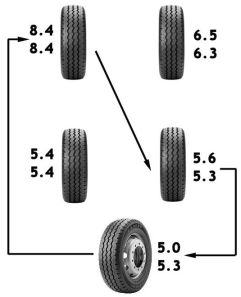
Update 3: At an odometer reading of 72,000 km, I have rotated some of the wheels for the third time, based entirely on tyre wear. The figure shows the swaps done and the measured tread depths after the swaps. The tyres are wearing remarkably well; it looks like they will outlast the recommended six year life before reaching tread depths of 2 mm, at which point they would have to be replaced.
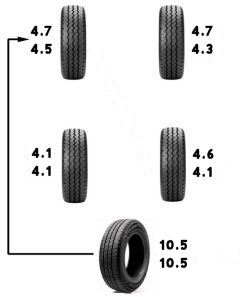
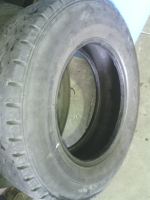
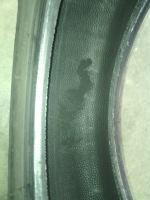
Update 4, Jan14: At an odometer reading of 93,095 km I have had to replace the least-worn tyre on the vehicle because of another valve stem failure. It seems that this was an original, since one of the tyres remaining has a build date of 2008. The tyre had a measured tread depth of 6.1–6.2 mm. Expecting to have to replace other tyres, I measured them for wear. Again, the numbers are the measured tread depth after rotation. The upper number is the depth at the outer groove, the lower number is for the inner groove. They are all 4.1 mm or better — a remarkable achievement for 93,000 km with plenty left! My Fiat servicing agent has confirmed that the tyres are showing little sign of deterioration due to UV or Ozone attack. I have decided to leave all tyres in position for the while and make the new one the spare.
The new tyre, installed as the spare, is a Sailun Commercio VX1 113/111R 8PR 215/75R16. This is well reviewed for grip, braking and tyre wear.
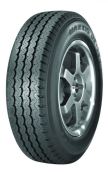
I will investigate replacing the valve stems with high pressure snap-in types such as Alligator PKW Transporters available on eBay uk.
Update 5: May14: At an odometer reading of 96,747 km I became too nervous about the 8 year age of the CV3000's and decided to buy new road tyres. On advice from my local Bridgestone Select franchise, I chose Maxxis 215/75R16 113Q UE-168 tyres at a cost of $780.00 balanced and fitted. Like the Sailun spare, the UE-168 is well reviewed with a high level of user satisfaction overall, particularly for grip, braking and tyre wear.
The UE-168's have a new-tread depth of 10.2 mm.
Inflating Tyres
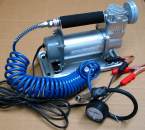
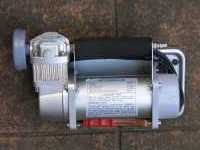
After some research, I bought a Kincrome P13012 12 V air compressor. It specifications are:
- Cast alloy casing with heatsink for rapid heat dissipation.
- Screw on air filter with easily replaceable element for clean air intake, ensuring extended life of the compressor .
- High performance PTFE piston ring and stainless steel valves.
- Quiet, high efficiency gearless direct drive design.
- Protective alloy base tray for stability and protection against dirt ingress.
- Nitto air outlet with protective rubber cover
- Conveniently located On/Off switch
- Rubber feet to reduce vibration.
- Powerful .25HP permanent magnet motor drawing 15 to 40 amps max.
- Battery Clips
- 30amp In-line Fuse
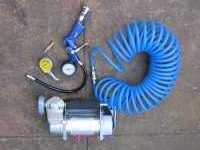
I replaced the hose with a 10 m coiled one, and the nozzle and gauge too. Both are Trade Air branded from Bunnings. I also turned the compressor 90° on its base tray so it fits under the driver's seat.
For checking the tyre pressure I use a Slime 0–75 psi dial gauge. It and the Trade Air gauge appear to be accurate.
My tests show a tyre inflation time of 2 minutes from 50 to 65 psi and 90 seconds from 35 to 55 psi.
Tyre Checkers
I replaced the tyre valve dust caps with Tyrecheckers®. These pressure indicators allow the user to check the tyre pressures at a glance. Screwed onto the valve stem, they depress the valve and the tyre pressure moves a calibrated, vented, diaphragm in the device. The diaphragm is green for good, yellow for 10–15% low, and red for 20–25% low.
I had no end of trouble with them. I found that one of the devices leaked air through the vent on the cap, which indicates a faulty seal in the diaphragm. Then over several thousand kilometres of smooth and rough roads I had four instances of the devices leaking — one morning a tyre was completely flat! I discussed this with the suppliers, sent back the devices and was given a refund even though I did not ask for it.
I do not recommend these devices for monitoring tyre pressures!
Deflating Tyres
In order to improve the ride and overcome to some extent the inadequate Fiat Ducato suspension, I reduce the tyre pressures for travel on severe corrugations or in sand. Typically I reduce the pressure to 45 psi, though if stuck in sand perhaps to as low as 35 psi. (Others tell me I should be able to go much lower if necessary.) It is important then to keep the maximum speed low, certainly no more that 80 kph, and to reinflate the tyres to normal pressures when on the bitumen.
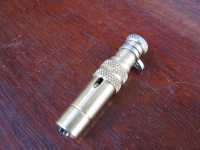
There are several devices sold to the 4WD market to assist in deflating tyres, but the one I favour is the low price (under $30.00) superbly hand crafted Ferret deflator. You simply screw it onto the valve stem and turn the inner shaft anticlockwise to remove the tyre valve which is captured in the body of the Ferret. Tyre deflation happens very quickly in a fully controlled manner. After a count of 6, the pressure has dropped from 65 psi to 35 psi; turning the Ferret inner shaft clockwise reinstalls the valve and stops the air loss.
Snow Chains
In July 2011 we drove over the Victorian Alps in the snow. We were required to use snow chains around the Mount Hotham peak. This worked so successfully on the Ducato that I resolved to purchase a set of chains to carry for possible use not only in snow, but also recovery use in sand and mud. The chains have huge grip and a big advantage is that they can be fitted even when the vehicle really is stuck/slipping. I don't forsee fitting them unless really required by the conditions.
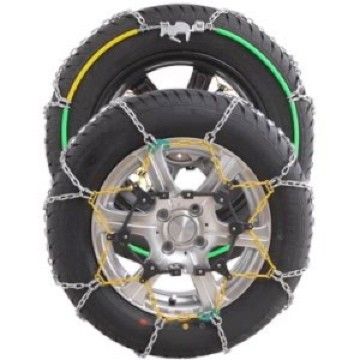
I have bought a set of Autotecnica CA410 - Autofit for 4WD chains from Everything Auto off eBay for $160.00 delivered. These chains are diamond pattern and suit a number of tyre sizes, including 215/75-16 and 225/75-16 and 225/70-16, the important sizes for the Ducato.
The chains are heavy and have to be carried under the bed, as there is no room elsewhere.
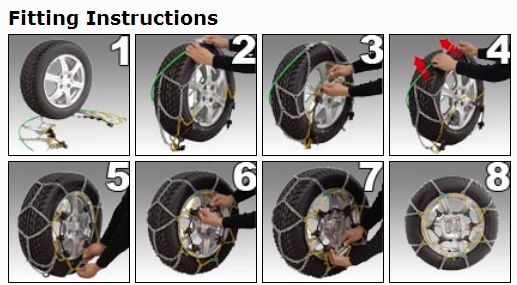
The fitting instructions from Autotecnica are reproduced here for reference:
Snow chains are not recommended for general use in mud and sand as they are likely to break if they hit a solid object and they don't self-clean off clay readily. However, for the rare occasional recovery use they should be fine.
LINKS
- Fiat Australia (Ateco) http://www.fiatcv.com.au/cms
- CMCA http://www.cmca.net.au
- Bridgestone Tyres http://www.bridgestone.com.au
- Bunnings Warehouse http://www.bunnings.com.au/
- Ferret Tools mailto: ferret@e-wire.net.au
- Everything auto http://stores.ebay.com.au/KYs-Auto-Parts-Accessories
Tyre Maintenance
Tyre totally destroyed from a blowout.
Delamination (one part circled) may have been the cause of the blowout.
At 93,000 km another tyre failure. This time definitely due to valve stem cracking. Hard to see, but a dark area on the sidewall indicates that the tyre ran flat and likely shredded rubber inside before I could stop.
Inside the tyre: powdered rubber is an indication of major damage to the inside of the sidewalls.
At 93,000 km, cracking of the valve stem at the rim location caused the best tyre on the van to deflate with sidewall damage.
The Kincrome 12 V compressor p13012 mounted on its side on the base tray.
The modified compressor, 10 m hose, nozzle, Slime pressure gauge and Ferret deflator.
The Ferret deflator.
In the Victorian Alps with snow chains fitted.
