Miscellaneous Modifications
...
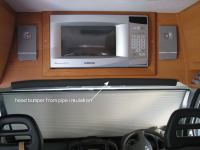
Head Bumper: Very First Enhancement
Although a walk-through between the cabin and the house is essential in a small van, stooping to clear the rear lip of the ceiling is often not enough and a painful bang on the head results. This had to be dealt with.
A visit to Clark Rubber to obtain a length of split black foam 16 mm pipe insulation with glue edges is an easy fix.
Fog Lights
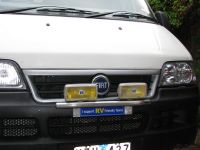
I have added a mini bullbar and fog lights to the front of the Ducato. The vehicle already has rear fog lights, and front fog lights were an OEM option. I made a remarkable discovery: all the wiring, relay and switch gear for front fog lights are already installed in the Ducato. They are just not enabled. This is what I did:
- In each mud guard just behind the bumper bar there is a cable pair (purple, black) that is for a fog light. I soldered wires in place and put connectors at the other end for the lights.
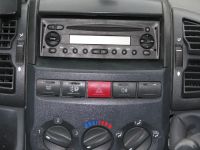
- In the cab, the control panel below the radio has five switches. The second from the left side is meant to be for the OEM fog lights. Prising off the switch cover reveals the LEDs for night time and for fog lights "ON". The newly-installed fog lights will turn on if the momentary contact switch near the bottom there is pressed while both the ignition is on and the parking lights are on.
- With a sharp knife I cut off the four small tags at top and bottom on the switch cover that stop the cover from actuating the momentary contact switch.
- I then drilled out the switch cover to make the green ON-LED visible (the slot depression at the top of the cover) and drilled a pattern in the face of the cover for night time visibility.
- Not essential, but a nice touch, is to find two compression springs ~2 mm diameter and 12 mm long. These fit in each side of the switch cover.
- Finally, I pressed the switch cover back in position.
There is a 15 Amp fuse in the relay circuit, which should be plenty for most lights.
Sliding Door Lock Actuator
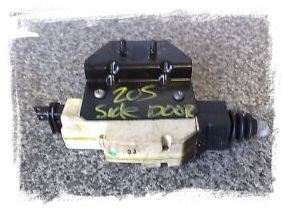
Sept2013: I finally had enough of locking the sliding door manually. The actuator for that lock had not been working for many months. It unlocked alright, but would not lock. The photo shows a second-hand one that is for sale on eBay UK for £33.50 delivered. I removed the actuator, drilled out the copper rivets and confirmed it worked in lock and unlock directions — this was actually rather challenging given the way it works. I replaced the rivets with bent 2.6 mm nails and reinstalled it. It tested OK for a couple of goes and then failed.
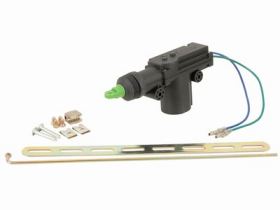
A replacement was in order: JayCar has a generic slave actuator (Part LR8813) for $12.95, for about the same price including delivery and a long wait from on-line sellers. The OEM mounting bracket fitted easily, locating the actuator in the right place except for being a bit too high. So I had to put a large kink in the linking wire to fix that. Unlike the OEM version, the green head swivels 360° and this allowed the linking wire to detach after an actuation or two. I had to bend the wire at that end into a fishhook shape. Perhaps I should have used the supplied linking wire to make a new one.
Cab Roof Insulation
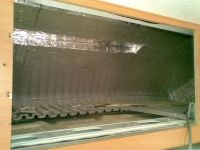
Although the house is well insulated, in hot weather we found that a lot of heat entered the Applause via the ceiling of the Ducato cab (it became quite hot). And through the back wall of the cab ceiling. Investigation showed that the roof over the Ducato cab is bare painted steel; there is a large air space between it and the ceiling of the cab, partly filled by the microwave oven that is mounted there.
Since I had some at hand, I fitted 25 mm builder's "Cathedral Foilboard" (expanded polystyrene sheet covered in aluminium foil), to the under side of the roof above the Ducato cab. Three lengths of 510 mm wide pieces just wedge into position. Cutting to a template I also fitted triangular shaped Foilboard to the sides of the cab roof. 50 mm aluminium tape sealed all joints, and a cutout in the Foilboard had to be made to allow the microwave oven to slide back fully into position.
Dryer/Airer
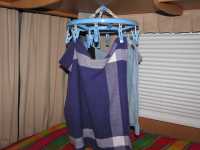
From an Asian homewares shop, I have mounted a 300 mm dia circular dryer "line" under one of the overhead cabinets at the back of the motorhome such that it does not obstruct any rear view. The dryer frame is bolted into a claw nut and a dab of Locktite so that it can freely spin. We usually travel with tea towels hanging.
Wireless Weather Station
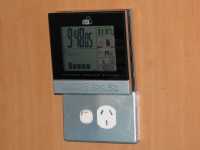
Always a topic of interest, the indoor and outdoor temperatures where we are camping are displayed on the Wireless Weather Station. I have tried several of these but have mostly been disappointed. The best so far is one sold on occasion by Australia Post:
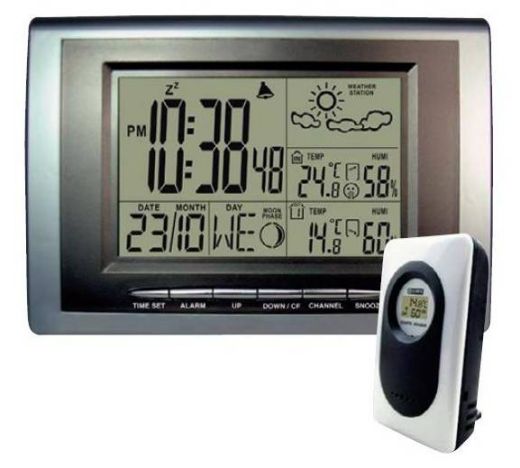
This weather station has several good features that are not so obvious: its transmitter is powered by two AAA cells rather than a button cell, so it lasts longer between battery changes; it transmits at the standard 433MHz and so can be read by a previously-bought different station in the home as well as the one in the van when at home; the station has a screen that can be easily read over a wide range of angles; the station clock is easy to set, with both forward and backward buttons.
The location of the temperature transmitter module is far from trivial. It should not be in direct sunlight, should not be exposed to reflected heat, nor to power-train heat, should be out of the weather, yet still give a reasonable representation of outdoor temperature. Inside the external rear view mirror housing is a favoured spot used by several vehicle companies. It works well in this case too.
I chose to put the temperature transmitter (inside two snaplock plastic bags) in the nearside external mirror housing.
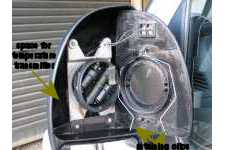
The mirror was rotated inwards as much as possible to expose the back of the mirror, and a small piece of wood was used to pry loose the retaining wire from the catches at the bottom of the cap over the mirror motors. There is a lot of space available next to the mirror motors for the transmitter. The retaining wire is then reassembled and the mirror pushed back so that it clicks into position.
The photo presented here (click to enlarge) makes this clear enough. By the way, this exercise uncovered that the external rear-view mirrors are wired with heater elements. Now, I wonder if they can be activated?
Air Conditioner
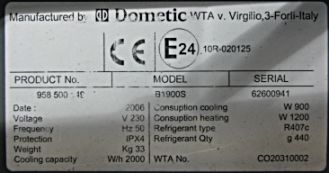
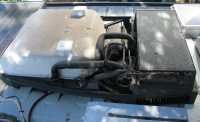
The roof-top air conditioner is a Dometic B1900S and is mounted just forward of the shower/toilet (see roof-top view). The 230 V (only) unit has a cooling capacity of 2000 W from the refrigeration unit, and a heating capacity of 1200 W from the simple resistance heating coil. It is very noisy and blows cool or warm air forward, which is not the best direction most of the time. This must be why the installation manual states:
If only one unit is going to be installed, this must be positioned in the rear part of the vehicle.
- which it is NOT in the A'van Applause 500. But by opening the forward air directing flap right out, air is to some extent blown backwards.
I have been advised that the B2200, which has a more flexible air distribution box, is a "drop-in" replacement for the B1900S. Just add $$$ (and a lot of work).
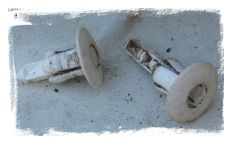
The air conditioner should be cleaned out occasionally, to remove buildup of leaves, spider webs, etc. This involves removing the cover, and to do that requires removal of the three two-stage rivets on each side. Removal of the rivets is simple: press the centre pin in several millimetres, and the rivet comes out easily. Reassemble the cover with the rivet centre pins removed, and then push them in flush with the outer case of the rivets.
To slow down UV damage (which has been rapid with the shower room vent lid), I am periodically (6 mo) wiping the cover over with ARMOR ALL® Original Protectant.
Door Speakers
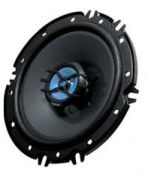
The OEM Ducato cabin door speakers are not the best. They are 6"/155 mm diameter.
A sale at Strathfield Audio saw me the owner of a pair of Sony XS-GTF1625B 2-way speakers for $14.00 (listed for $99.00!). These are 160 mm diameter 4Ω rated at 40 W and have a flat front. They were an easy replacement for the OEMs using crimp connectors to plug into the Ducato speaker wiring.
I ignored the existing dash-mounted tweeters.
Table Secured
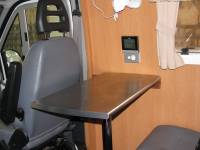
The house table is supported on a single tubular leg that fits into conical mounts on the floor and the underside of the table. It is not a very firm arrangement, and if the table is leant upon, it can move a lot.
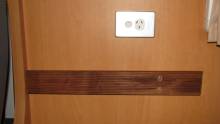
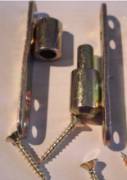
I have improved the stability of the table using a timber stay bolted to the wall next to the table. The end of the table rests on this stay and is held firmly in position by a Hettich "restoration hinge Ref.00699", a single heavy duty split hinge.
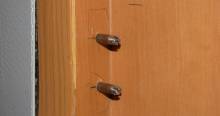
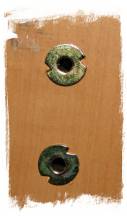
One end of the timber stay fits over two 6 mm dia. steel pins drilled and tapped into a bulkhead behind the driver's seat. Towards the other end, 3 mm dia. machine screws pass through the stay into hollow wall anchors (see boat mount for a description) that lock up against an internal bulkhead and the ply wall lining there.
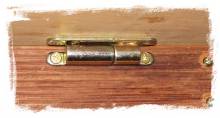
To set the table in position, it is placed on its stand and rotated anticlockwise until the hinge pin screwed to the table passes into the hinge socket screwed to the stay. The photograph shows the hinge fully engaged with the table in position.
LINKS
- JayCar http://www.jaycar.com.au
- A'van http://www.avan.com.au
- Clark Rubber http://www.clarkrubber.com.au
- Road Safe Water Filters http://www.roadsafewaterfilters.com.au
- DealExtreme http://www.dealextreme.com
- Foilboard http://www.foilboard.com.au
Modifications
Foam pipe insulation makes a good head bumper
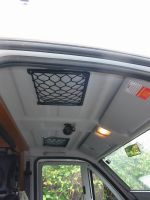
Two net magazine racks bolted to the ceiling of the cab.
Two Narva 55 W fog lights with covers on, on front of Ducato mounted on an X-bar.
Ducato control panel. The front fog light switch is second from the left. Second from the right is the rear fog light switch.
Foil-board insulation installed in the Ducato cab roof. The cutouts are to accommodate the microwave oven.
Circular dryer frame bolted to base of rear overhead cupboard.
Early wireless weather station (Jaycar) next to the table, above added power point.
The roof-top air conditioner with cover removed (front on the left).
Table held in position with wall-mounted stabiliser.
