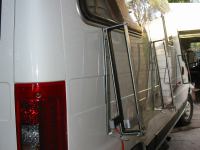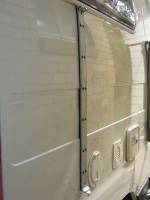
Mounting the Porta Bote
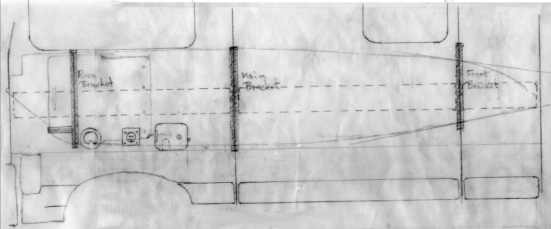 The (much used) tenth-scale sketch of the layout of the brackets on
the side of the Applause. The Porta-Bote folds to 100 mm thick.
How to Mount the Bote
Given the location of the seams on the Fiat, this dictated three brackets including two close to seams and one at the rear (but not on a seam) to provide the locking arms that stop the bote from being removed from the brackets by no-gooders.
I decided to make the brackets out of 40 x 5 mm mild steel flat, welded as necessary by a local gate manufacturer, and finished with a hot-dip galvanising as arranged by the same people.
But how to attach the brackets to the 1.2 mm steel wall of the Fiat? My approach is to use hollow-wall anchors for most of the mounting bolts. These are designed for use in such sheeting materials as plywood, hardboard and plaster etc when the reverse side of the material is inaccessible.
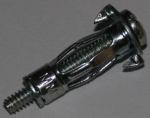
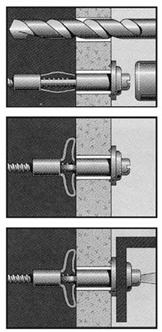 The diagram shows the method of installation and the
way the anchor collapses to hold in position.
I would need to use 1/8" x 25 mm anchors since these have the shortest shank; these require an 8 mm diameter hole for insertion, as well as slots to admit the non- rotation barbs. The bolt for the type chosen has a large flat head and a fibre washer to keep dissimilar metals apart. A test showed that the method would work.
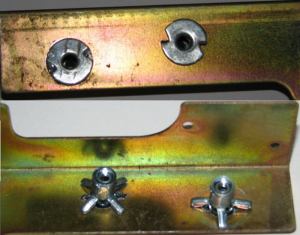
I would use two columns of anchors 19 mm apart and 100 mm between rows. However, at the top and bottom of each bracket I decided to use a single 3/16" x 50 mm spring toggle because I think I can get more grip and strength from these than a hollow-wall anchor. These normally would require a 9/16" dia hole to insert the toggle, but this then means the screw is very poorly positively located.
 Instead, I drilled an even larger hole (19 mm-3/4")
and used a 19 mm stainless steel washer with 3/16" centre hole to sit in the gap between
the toggle and the bracket, i.e., in the van wall. The result is a fastener that is firmly
positioned and can take a lot of side force. The bolts used have countersunk heads, not the
raised heads as shown in the pic.
 For one of the brackets, the space behind the van outer
wall was very restricted and instead of a spring toggle I used a gravity toggle, installed
in the same way. Now the spring and gravity toggle bolts use a hardened steel nut but a
low strength bolt. On one bracket installation the thread partially stripped (twice) upon
tightening. Replacing the bolt with a 3/16" stainless steel one solve that problem. I will
do this to the other brackets if I need to take them off again. (I have developed some
facility in fishing out the toggle from the wall cavity without dropping it!)
Building and Installing the Brackets
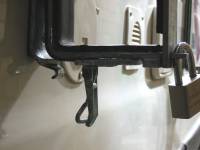
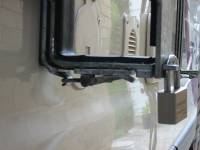
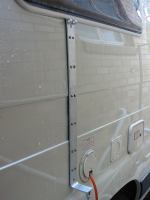
Bracket design is based on pictures of others but with the addition of being hinged at the top, and held closed at the bottom by a clamp similar to a Protex obtained from CARAC. The photographs best show the design of the brackets, as they do the installation.
Note that all touching surfaces were covered in sponge rubber, 38 mm x 2 mm for wall contact and 38 mm x 3 mm for boat contact, contact cemented into place. This is particularly important for clamping the brackets to the van wall: the rubber allows some uptake of the hollow-wall nut assembly for better grip and also makes a water proof seal and reduces contact between dissimilar metals. A copeous amount of Lanolene grease was used during assembly of the hollow-wall nuts and installation of the bolts, to slow down rusting.
The clamps at the bottom of the brackets can be used to neatly prop them away from the van when electrical and water services are connected.
Update on Brackets
I replaced the other upper toggle bolts with 3/16" stainless steel bolts. In the process I found that the gravity toggle had failed, so replaced that with a piece of 5 mm steel flat, drilled and tapped to take the bolt. I also drilled a couple of small holes and used tie wire in those holes to locate the steel flat in position while the bolt was screwed into place.
Belatedly, I realised that with the pivoting brackets off their bases, the lower arm of the bases was a hazard to people walking past the van. I have reversed the latch device on the lower part of each base and bracket, foregoing the ability to prop the brackets away from the side of the van - not in practice an issue. Now, with the brackets off the van, the bases remaining are practically flush with the sides.
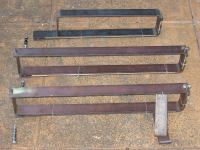
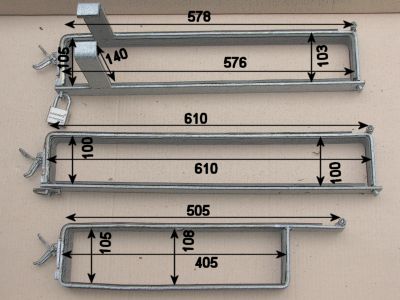
Here is some detail on the dimensions of the brackets made from 40 x 5 mm mild steel flat. All dimensions are in millimetres, and are inside measures for the steel (the sponge rubber is not included). If I were to make the brackets again, I would make the width for the bote a little larger, say 106 mm, except for the front bracket which would be better at 110 mm. I would also make the front bracket shorter, rather less than the present 405 mm. It was very difficult to judge just how the brackets would sit with the bote without actually installing it all on the side of the motorhome. Even so, they work well as is.
LINKS
- A'van http://www.avan.com.au
- CARAC http://www.carac.com.au
- Clark Rubber http://www.clarkrubber.com.au
- Whitworth Marine http://www.whitworths.com.au
Bote Mount
The three brackets wired ready for welding.
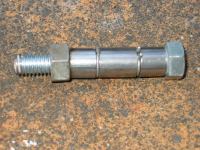
Closeup of the tubing used to make the top hinge, wired ready for welding. A stainless steel bolt and nut will form the hinge pin.
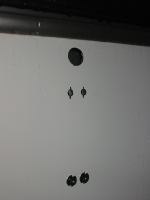
Holes in Applause for top toggle anchor, two hollow wall anchors, and two already fitted.
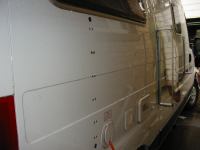
Two brackets trial fitted, all the holes for the last bracket made.
Bracket base attached to Applause. 14 anchors are used!
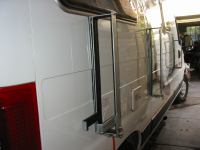
All brackets are in position, with sponge rubber and fastener clips installed.
Showing the brackets hinged for services access, resting on bottom clamps.
Modified base without bracket attached: much less protrusion and reduced hazard. Compare with picture five above.
