Pool Room and Pool
It is a painted concrete and tile pool nominally 70,000 L (4.53 m x 10.50 m with a depth varying from 1.2 m to 1.88 m: a volume of 67,300 L) with a small spa section (1.2 m x 2.3 m and 0.5 m deep: a volume of 1,400 L). Adding 1,000 L of water increases the pool depth by 20 mm.
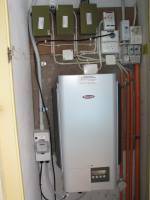
When the pool was installed in the early 1980s by a previous owner, a gas boiler was used to heat the air and the water, along with two room vent fans to control humidity. A complex of timeclocks and circuits powered the arrangement. I have removed the boiler and much of the electrical wiring, converting the pump room into a workshop and the switchboard as a convenient place to mount the grid-connect solar inverter.
Electrics
The pool-room switch board is powered by a high capacity line from the house switchboard on phase B. Another feed for lights also enters the pool room.
The pool pump and spa blower are connected to separate circuits split off this power line, as are the circuits for the adjacent workshop.
Underwater Lights
These are 24 V WN 250 types originally with 150 W bulbs. Replacement bulbs are BLV 24 V 100 W made in Germany. Three green 22 V transformers for the lights are located in the switchboard area.
Plumbing
The pool plumbing uses 50 mm and 40 mm Class 12 plastic pressure pipe. The pool pump, sand filter, salt chorinator and flow valves are all located in the workshop adjacent to the poolroom.
Pool Pump
A Hurlcon CX320, dated November 2004, used to drive the sand filter. It was probably rated at 320 L/min at 7 A. This would mean a pool turnover time of 4.2 hours.
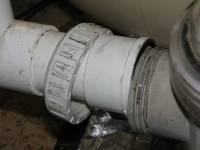
When attempting to fix a leak from the connection to the pump inlet, I discovered that the connector was cross threaded onto the pump inlet, that the connector thread pitch was not the same as for the Hurlcon thread on the pump and that the connector was attempting to make a seal using an 'O'-ring pressed against the face of the narrow thread end on the pump.
I replaced the connector with the correct Hurlcon fittings, obtained from PoolWerks. See p69 of the Hurlcon Trade Catalog.
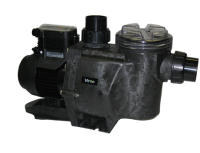
Dec2011: The pump was replaced with a new Viron P280 Pool Pump, a 3 speed DC motor / pump combination, at a cost of $659.00. Its energy consumption along with the chlorinator set at 3, was measured as Fast: 893 W, Mid: 720 W, Low: 472 W.
The P280 automatically starts on Fast for the first 5 minutes to assist priming and then reverts to whatever the set speed is. The recommended operation for an 80,000 L pool is 6.5 hours per day on Low, 5.5 hours per day on Mid, or 4.5 hours per day on Fast.
| Speed | Power (W) | Time (hours) | Energy (Wh) |
| Fast | 893 | 4.5 | 4018 |
| Mid | 720 | 5.5 | 4034 |
| Low | 472 | 6.5 | 3142 |
Sand Filter
The Hurlcon RX280 Sand Filter is rated at 85,000 L for a 6 hour turnover using 125 kg of quartz sand filled to the top of the widest section (top of the name plate). It has a multiport valve on the top which should only be changed with the pump turned OFF.
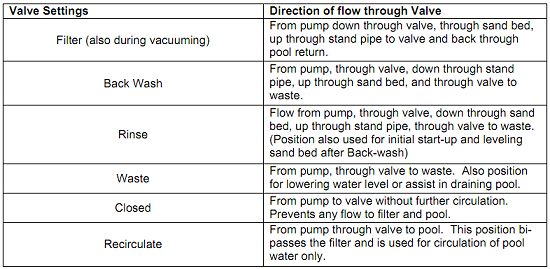
Maintenance of the filter is documented here. The filter runs at a pressure of 90 kPa when fairly clean. It needs cleaning when the pressure rises to around 120 kPa. The steps required are mentioned next.
Salt Chlorinator
I have added a Hurlcon VX 9T salt chlorinator in place of using chlorine tablets. PoolWerks (Paul) plumbed this in in May 2010. The pool pump is plugged into the controller.
Salt is added to the pool water to bring the salinity up to at least 3 ppt (10% of seawater), but preferrably to 4 ppt.
The Technical Reference Manual describes the operation and maintenance of the chlorinator.
The chlorinator controller has four timers for chlorinator/pump operation. Timers are set by entering a start time and period for how long to operate. The HOUR digits go from Not Used and then 0 to 23.
The chlorinator controller has a "Safety Backwash" switch that runs the pump without the chlorinator for 1, 2 or 3 minutes. To clean the filter using sand as the filter medium:
- Run the pump for 3 minutes with the multiport valve in the 'backwash' position
- Run the pump for 1 minute with the multiport valve in the 'rinse' position.
Cell Maintenance
The chlorinator cell plates may be manually cleaned of deposits of salt and calcium:
- Remove the cell from the filtration system
- Fill the cell with a mix 1:10 of hydrochloric acid:water and leave to stand for a few minutes
- Repeat if necessary and then rinse in clean water
- Reinstall the cell into the chlorinator.
Pool Chemistry
Summer: The pump/chlorinator should operate for 8–10 hours per day, 4–5 hours in the morning and 4–5 hours in the evening.
Winter: The runtime should be for 6–8 hours per day, in the morning and evening.
Chlorine Level
The free chlorine residual level should be between 2 and 3 ppm.
Stabiliser
Stabiliser reduces the effect of sunlight dissipating the free chlorine in the pool. For an outdoor pool it should be between 30 and 60 ppm. However, ours is indoors though with a lot of light penetration. It is probably not necessary to be concerned about this factor.
pH Level
The pH level should be maintained between 7.4 and 7.8 for our pool. The process of salt chlorination tends to raise the pH, so regular addition of hydrochloric acid is required. As at November 2014, 20 litre of Bondall Hydrochloric Acid costs $48.00 from Bunnings.
Total Alkalinity
The ideal range is between 80–120 ppm and 160–180 ppm.
Calcium Hardness
Should be closely monitored and kept in the range 270 to 330 ppm.
Salt Level
Salt level should be maintained around 4.0 ppt (4000 ppm) and never allowed to fall below 3.0 ppt. With a reading of electrical conductivity (EC), and a particular conversion factor (PoolWerx seems to use 0.54 ppt/(mS/cm)), the salinity is:
If we need to add salt to bring the salinity up to a desired value (say 4.0 ppt) then the weight of salt to be added can be estimated here, assuming that V/V is close enough to M/M at these low concentrations and that the water content of commercial pool salt is 16%
Room Ventilation
Sliding doors on the north wall, hinged doors on the east wall.
Two Maico EV 31 window fans are mounted in the east wall above the doors. The louvres on one of these fans did not operate (dead small synchronous motor) and several cover attachment parts were broken. Tests of the fans caused the circuit breakers to trip several times, for no apparent reason.
Replacement parts were bought direct from the manufacturer in Germany at considerable expense, since the local distributor does not handle the particular model. An EVR 22-31 motor gearbox and some replacement cover retaining clips were bought for a total cost of almost $200.00 by bank transfer, which included numerous rip-off conversion and freight fees. The new louvre motor/gearbox required some modifications to fit.
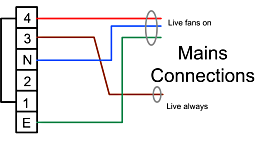
A test of the installed units resulted in tripping of the circuit breakers again, but a check of all the wiring uncovered nothing unusual. I suspect that the problem was due to occasional misalignment of the internal plug and socket in the fan units. All is right now. [See electrics update Nov14 for what is evidently the real explanation!]
The wiring to the fan units is shown on the left. There are two active lines going to the fan units.
The wall switch plate on the switchboard for the ventilation fans is wired as shown here. Both active lines to the fans can be switched off by the one switch. The other switch starts the fans and opens the louvres or stops the fans but still allows the louvres to close.

A check on the way the louvre relay, motor, and cam-operated limit switching for the louvres function gives the circuit diagram here.

With the power ON, switch fans to RUN and the fans start to blow. The louvre drive relays close and the drives start, opening the louvres until a cam activates a microswitch which then shuts off the drive. When the fans switch is set to CLOSE, the fans stop and the louvre drive relays open. The louvre drives start, closing the louvres until a cam activates a second microswitch which then shuts off the drive.
Spa Blower
The spa blower is a dega (now Onga?) Cat.No. 1-0412-00. It is rated at 240 V 5 A and is plugged into the pool switchboard.
Pool Room Roof
The glass in the pool room roof was replaced over three days starting 20 May 2010 by Alligator Glass. See the page on glazing for more detail.
Pool Repair
Rust Outbreaks
Before we purchased the house in early 2010 we had observed rust emerging from a wall between the spa and the pool, and that the surface of the pool in several areas was rough with the paint worn away. By early 2013 there were two outbreaks of rust and it was getting worse.
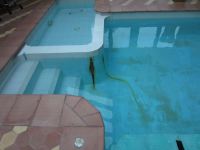
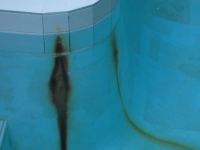
Enquiries about repairing the rusted area did get a response from PJpools, who quoted $220.00 to acid wash the affected area and then $95.00 per hour per person to do the repair. I did an acid wash myself and it achieved almost nothing so I decided to try to dig out the rusty areas.
It took three days to pump out the water from the pool using a submersible pump that was destined for the rainwater tank sump. The pump seized after a couple of hours (fortunately still just in warranty) but its replacement did well.
Some initial digging with a cold chisel and hammer exposed a layer of rust that ran between the two areas being attacked. The photos show the Marblesheen render and the black rust vein (arrowed).
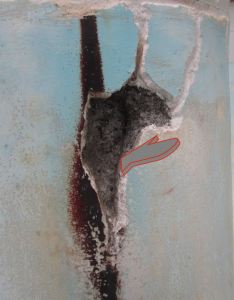
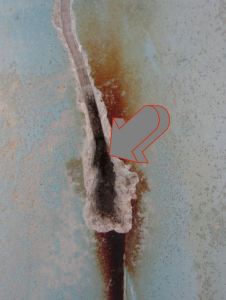
A lot more digging and the whole source of the rust was exposed: a vertical reinforcing bar was much closer to the surface of the concrete near the top of the pool than further down. It had taken over 30 years for this carelessness in construction to cause a problem:
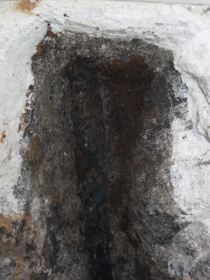
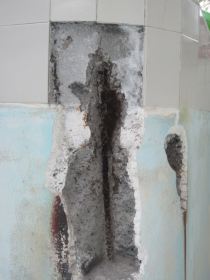
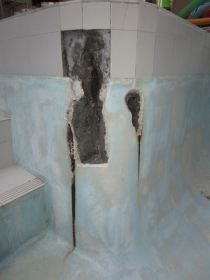
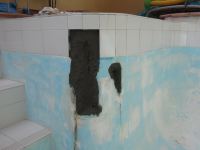
Further digging and an angle grinder removed a 300 mm length of badly corroded reinforcing iron and some pieces of fine tie wire from the main area. I dug down to the reinforcing iron in the second area but did no more than paint it with rust converter. The photo shows the areas cleaned out and the surfaces primed with acrylic cement additive.
Eventually, after much agonising I made up batches of Portland cement, washed sand and fatty sand (1:2:1) and acrylic cement additive in water and buttered up the cavities. The areas were filled in several stages. A wet towel was draped over the area and kept moist for a week, to allow the cement to harden slowly. It was then sanded smooth ready for grouting.
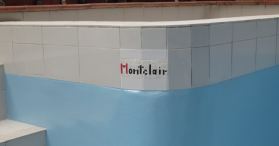
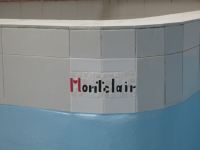
I replaced the two broken tiles with a mosaic spelling out the name of the villa: "Montclair". This was a difficult task, and the result is not all that successful.
Valve Cover
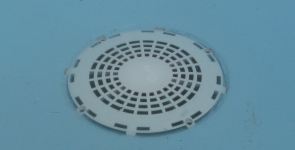
There is a hydrostatic pressure relief valve in the deepest part of the pool. This lets water into the pool if the pressure outside is too high. The cover for this valve was damaged and loose. Since the pool was empty an Onga anti-vortex drain cover could be fitted, screwed to the floor with four stainless steel screws.
Repainting the Pool
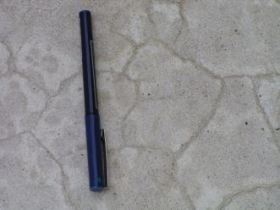
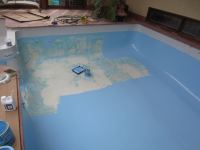
Only with the pool empty could the extent of the deterioration of its surface be fully appreciated.
The walls and floor were formed from blown concrete with a nominally 10 mm render of Marblesheen (a
fine quartz gravel in a bonding matrix), and finished with an epoxy paint. I doubt very much that the
pool has had any maintenance since its construction in 1980. The paint, designed to slowly wear away,
was long gone in several areas, highlighting original uneven roller application.
The rough areas were exposed friable Marblesheen and there even were small areas of exposed concrete; a
surface in relatively good condition is shown in this
photograph.
The surface would have to be cleaned, repaired and painted. I was quoted ~$12,000 for
a repaint, but the recommendation was to have the whole pool tiled and this would cost over $15,000.
I decided to paint the pool with Epotec high build epoxy paint, supplied by Hitchins Technologies. With lots of advice and encouragement from Chris Hitchins, I followed the surface preparation instructions dated November 2012 for Marblesheen surfaces which were available on the Hitchins Web site and attached here. The current instructions, dated May 2013, involve using different Davco products that are not yet available at my local Bunnings Warehouse.
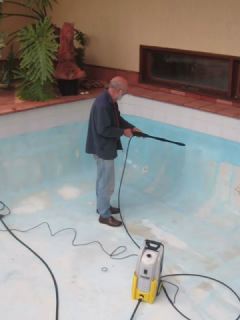 Using a medium pressure jet, I pressure washed the whole pool with a very weak detergent. Particularly
near the shallow end, lots of the Marblesheen came away, leaving some large cut away areas up to ~12 mm deep.
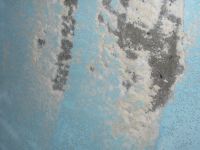
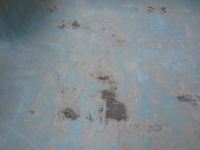
- Checked all surfaces for drummy areas by tapping with a cold chisel and cut out those few that
were found. However, there were lots of areas where the Marblesheen had become really soft and loose and
I had to dig these out.
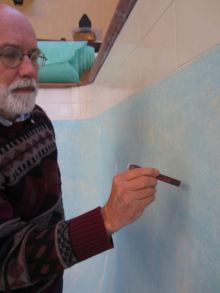

- Sanded the whole pool with 40 grit paper on an orbital sander to remove loose paint and debris.
- Vacuumed the pool to remove all the dust and loose Marblesheen.
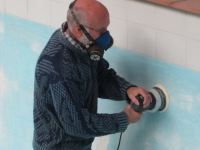
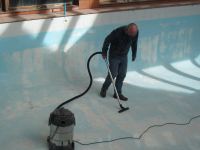
- Again brushed down the pool with detergent and pressure washed it.
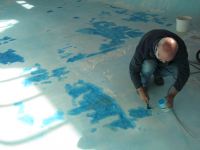
- Painted with Davco Ultraprime (blue) all the areas to be
filled. (I actually first only did the deep end of the pool as a trial, going on to fill/build up the
surfaces to learn what was involved.) I used a total of two litres of Ultraprime @ $19.00/litre.
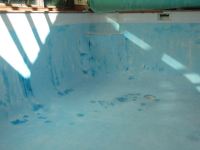
- Trowelled in all cutout areas with Davco Colourgrout (white) mixed with a 50% water solution of
Davco 4 in 1 Grout Additive. I initially used batches of 250 ml of water and 4 in 1 with Colourgrout
added but later progressed to 500 ml batches. This was the largest usable. (I actually did the filling
in two or even three stages, building up the deeper areas so that the grout did not "mud crack".) I
used a total of 48 kg of Colourgrout @ $31.90/15 kg bag, and 6 litres of 4 in 1 @ $13.75/litre.
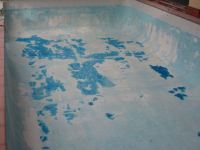
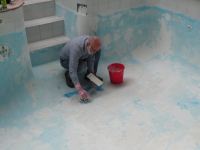
- Sanded the grouted areas and marked with chalk those areas requiring a further filling. Care
was required not to sand into the Marblesheen as this made a very rough surface.
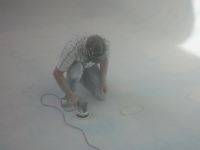
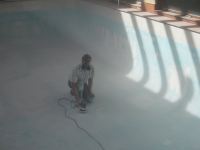
- Brushed and vacuumed all surfaces and then lightly pressure washed them and allowed a few days to dry.
- Placed an order with Hitchins Technologies for one pack of Epotec sealer @ $176.00, 12 packs of Epotec high build epoxy mid-blue/Bondi paint @ $165.00/pack, and 4 litres of thinners @ $55.00. Total $2,240.70 with delivery. It arrived from Sydney within three days.
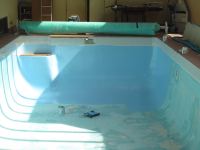
- Sep13: With all edges covered with masking tape and the pool marked out to indicate the expected coverage of each pack of paint, I was finally ready to paint! I first painted all the grouted areas with the Epotec sealer, including the grubbed out join between the tile row and the Marblesheen.
- Used a 230 mm paint roller with 12 mm nap to lay on two coats of the epoxy paint on all surfaces and
a third coat on the shallow end floor.
Some lessons:
- I did not attempt to clean the paint roller between coats, instead I used a new one each time.
- Each Epotec pack covered more area than expected and I could not seem to increase the thickness of application. So the third coat was essential to build a good thickness.
- I wasted a lot of paint by mixing up a whole pack for the last section of each coat of paint. I should have weighed out smaller quantities. I would have saved at least one whole tin, possibly two! As it is, I did save 500 ml of paint for later touch-ups or repairs.
- The result looks fantastic, but what matters is that it continues to do so for ten years or more!
Re-establishing the Pool Chemistry
Upon filling with mains water the pool had a disappointing green tinge, but this disappeared after a couple of days' filtering and use of a flocculant. Establishing the correct chemistry took much longer:
- Salt level: I added 15 x 25 kg bags of salt, bringing the salinity to 5800 ppm, a bit too high.
- Alkalinity: It took over 9 kg of sodium bicarbonate to raise the level to 120 ppm.
- Hardness: It took over 24 kg of calcium chloride to reach 300 ppm.
- Chlorine and pH levels: These were easy enough to adjust using the salt chlorinator and hydrochloric acid.
LINKS
- PoolWerks http://www.poolwerx.com
- Astral Pool (Hurlcon) http://www.astralpool.com.au/
- Pool & Spar Warehouse http://www.poolandspawarehouse.com.au
- Davco http://www.davco.com.au
- Bunnings http://www.bunnings.com.au
- Hitchins Technologies http://diypoolpaint.com.au
Pool
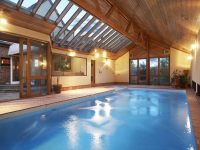
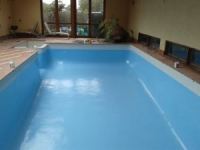
View from pump room/workshop area of pool room (sales photo).
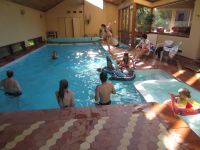
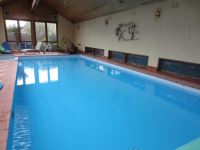
The pool in use 10 October 2012.
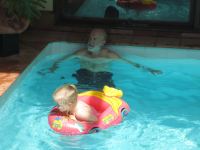
In the pool with granddaughter.
Pool room switchboard dominated by solar grid-connect inverter. Three transformers for pool lights above. Spa blower plugged into powerpoint. Room fan control switches above. Circuit breakers for pump, blower and lights. Unused time clock and powerpoints adjacent.
"Montclair" in mosaic on pool wall.
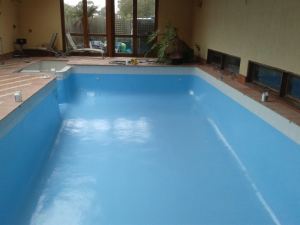
The pool with its new Bondi paint coat.
A few weeks later, pool filled and looking great.
