Thermal Insulation
Melbourne is in the Mild Temperate (Zone 6) with winter cool enough to require significant heating (see Your Home Technical Manual).
In 2010 Victoria signed on to the National Construction Code of Australia, a mandatory code governing the design and construction of new buildings from 1 May 2011. The current regulatory requirement for new homes, major renovations and extensions is that they meet a 6-star energy rating. This is expressed in the Building Code of Australia, BCA Code 2010 Volume Two Class 1 dwellings which has been adopted by all States.
Roof and Ceiling
BCA Code 2010 Table 3.12.1.1a specifies that for Zone 6, the minimum total R-Value of the roof and ceiling with a roof upper surface solar absorbance value of about 0.70 (red terracotta tiles) should be 5.1 (upwards heat flow). Adjusting for 0.5% to less than 1% ceiling area uninsulated requires the R-Value of the added insulation to be increased by approx 0.7-1.2.
A pitched tiled roof with flat ceiling and no under-tile sarking (ventilated cavity) is (Figure 3.12.1.1(c) of BCA Code 2010) R-Value (up) 0.23, (down) 0.74. If reflective sarking could be added below the tiles, it would increase the R-Value by 1.2 (downwards) or 0.6 (upwards).
A cathedral ceiling unventilated has an (BCA Code 2010 Fig 3.12.1.1(a)) R-Value (up) 0.36, (down) 0.48. If reflective sarking could be added below the tiles, it would increase the R-Value by (down) 0.66 or (up) 0.77 for a 35-45 degree pitched roof.
For an unventilated cathedral ceiling with reflective sarking and R3.0 ceiling batts maintaining a 25 mm air gap between, the R-Value would be (down) 4.1, (up) 4.2.
External Walls
Table 3.12.1.3a of BCA Code 2010 specifies that each part of an external wall should achieve a total R-Value of 2.8. Cavity clay masonry walls with render internally has (Figure 3.12.1.3(e)) total R-Value of 0.69, compared with a brick veneer construction R-Value of 0.56.
Sustainability Victoria recommends R5 or higher insulation for ceilings and R2.5 for walls.
Glazing
Conductance calcs for glazing are based on wintertime conditions to account for the balance between potential solar gains and heat loss by conduction through glazing.
Floors
BCA Code 2010 specifies (Table 3.12.1.4) for suspendend floors in Zone 6 a minimum total R-Value (downwards heat flow) of 2.25. Table 3.12.1.5 gives the total R-Value for a suspended timber floor enclose by cavity masonry and not more than 0.6 m high as 1.0 (up) and 1.1 (down). Double sided reflective insulation with a 90 mm airspace installed under an enclosed floor can add an R-Value of 0.55 for heat flow upwards and 1.97 for heat flow downwards. Both examples allow for dust on the upper surface in accordance with AS/NZS 4859.1. ICANZ (F0100) says breather double-sided antiglare foil adds (summer) 1.5, (winter) 0.50 for unventilated cavity.
The Ceiling Spaces
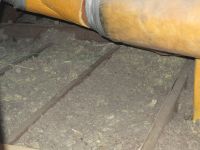
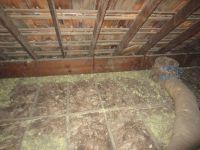
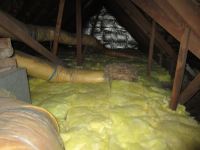
The house ceilings had been insulated with granulated rockwool. No sarking had been installed under the tiles. A scrap of The Argus newspaper found in the rockwool suggests that the rockwool might have been blown in in April 1937. However, the same rockwool was found in the lower ceiling which is a later addition. That and the filth under the undisturbed insulation suggests a much later date for installation of the loose insulation, perhaps as late as the late 1970s. Fourty years or more later, it had compacted badly, was displaced in many areas, and was filthy dirty. It had to be replaced or supplemented.
At 175 mm thick, R3.5 batts extend a little over the top of the ceiling joists (110 x 40 mm hardwood).
What is the effect of not covering the ceiling joists? Heat transfer through the ceiling is W, area A, temperature difference ΔT, impedance R. For the joists, subscript 'j', for the insulation batts, subscript 'i'. Then
W = A x ΔT / R = Ai x ΔT / Ri
+ Aj x ΔT / Rj
so A / R = Ai / Ri + Aj / Rj
but A = Ai + Aj
and for most of the ceiling, Ai = 430 mm, Aj = 40 mm,
so 470 / R = 430 / Ri + 40 / Rj.
If Ri = 3.5 and Rj = 0.7 (hardwood, 110 mm thick) then
470 / R = 180
and R = 2.6.
So the effective ceiling R-Value of adding R3.5 batts is 2.6.
For the same price as Bunnings (no delivery), the manager of Enviroflex, Andrew Arblaster, delivered 12 packs of Knauf Insulation's Earthwool E4342, an R3.5 glasswool batt 175 x 430 x 1160 mm that at 21 pieces per pack covers an area of 10.5 m². This is quite pleasant stuff to handle, unlike Bradford batts.
To achieve the goal of R5.1+1.0 (allowing for 0.7% uninsulated areas) will require adding R3.5 or better batts over these at right angles to cover the joists. This seems far more preferable than using higher R-Value batts that cover only a little of the low-performance joists, even though the batts will need to be disturbed if the roof space is accessed.
Insulating the Ceilings
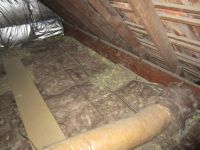
A series of photographs shows the Earthwool batts installed and the reuse of some of the
original granulated rockwool to fill small spaces and in some places instead of Earthwool.
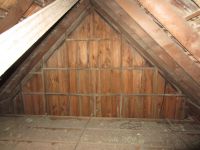
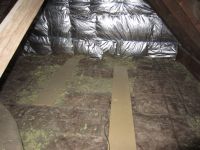
- The end gables were insulated with Earthwool and then covered in perforated reflective foil.
I stapled the batts and foil in place; binding tape provides some additional strength to the
install.
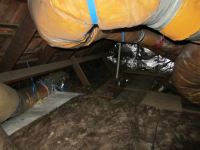
- The air conditioning ceiling boxes were also further insulated in an effort to reduce heat
transfer from them — my IR thermometer had shown that the ceiling vents were 44 C when
the ceiling was 33 C, though the result might be misleading due to the different surface
characteristics. A later test showed the added insulation had made practically no difference.
Second Layer over Ceilings
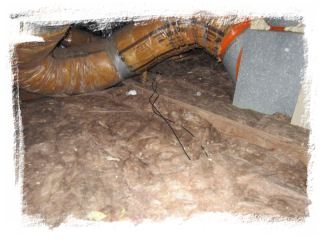
The quality of the upper layer of batts is not so critical, and I have used a mix of Earthwool, glass fibre and polyester R3.5 and R4.0 batts bought from a variety of sources. By far the majority are Shubbs R3.5 glassfibre batts — 12 packs at $10.00 per pack! These are really rubbishy; minimal binder so they shed fibres over everything (wearing a mask while handling them is essential), they are difficult to divide into individual batts, and several of the batts have large lumps of badly processed base material (much worse than Bradford Gold batts):
Shubbs Insulation offers the most competitive pricing and the highest quality insulation batts in the market. Our batts meet the highest Australian standard AS/NZS 4859.1:2002 for insulation.
They sure are cheap!
The upper layer of batts is laid over the top of and across the rafters and any access planks that are there. The end result should be an effective ceiling R-value of roughly 6.1.
The Walls
As noted in the YourHome Technical Manual p163, cavity brick walls have high thermal mass, but without insulation are usually too cold in winter, and often too hot in summer if exposed to prolonged heat wave conditions. If the cavity is insulated, the internal thermal mass (ie. the internal brick skin) is protected from external temperature changes, and becomes highly effective at regulating temperatures within the home.
Our house walls are double brick with a 50 mm cavity between. The Technical Manual notes that the R-Value for this kind of construction is about 0.5 m²K/W but others quote values as high as 0.72 ( ICANZ Insulation Handbook). This is little better than a brick veneer construction (R-Value of 0.45, but with reflective foil it is about 1.4).
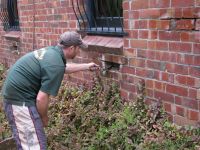
In December 2012 we contracted EnvirofleX to install a silicone-treated granulated rockwool that is blown into the cavity from the top of the walls and through accesses made by cutting out bricks. The rockwool is expected to give an additional R-Value of 1.35 (50 mm thick) bringing the wall insulation up to an R-Value of 1.9. This is well short of the ABCB requirement for new Zone 6 houses of winter R-Value = 2.80 but is the best we can do.
EnvirofleX insulated all the N-S cavity brick walls (west, east and both sides to Bedroom 1) and the south cavity brick wall in the courtyard. Only the north front-facing wall was left, reasoning it is mostly windows and it's far more important to get these right. The all-up charge was $3150.00 inclusive of bricklayer expenses.
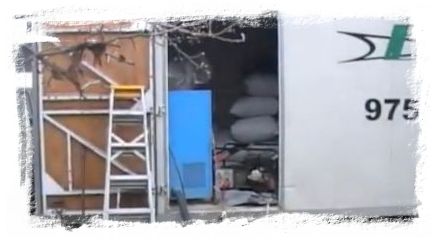
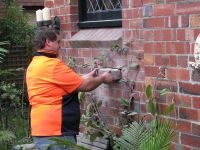
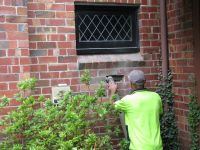
Bags of the granulated rockwool were emptied into a blower unit in the EnvirofleX van on the street and pumped through large diameter hose to the job. Most of each wall cavity was filled by first removing bricks or vents from the wall in a pattern based on experience and pumping the insulation through the hole.
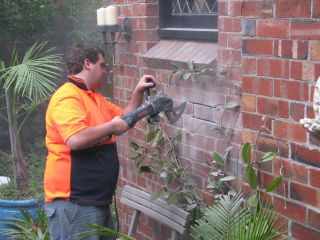
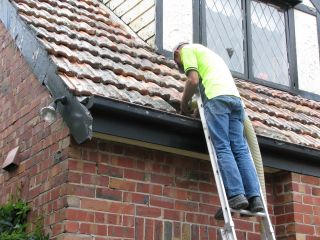
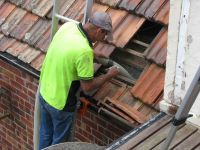
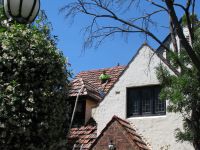
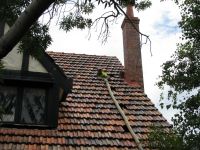
The fill was completed by accessing the top of the wall cavity from the roof, though this was a rather difficult undertaking for the East and West walls where the top of the brickwork is about a metre above the bottom of the wooden gables and required entry into the roof space.
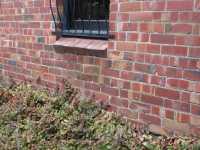
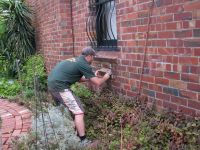
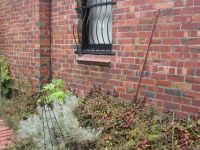
A specialist bricklayer then replaced the bricks using a mortar matched to the existing. Spraying the brickwork in the vicinity of the hole with canola oil before patching minimised cleanup.
The Windows and Glass Doors
Insulating these is discussed in the Page on Glazing
LINKS
- Enviroflex http://www.enviroflex.com.au/
Thermal Insulation
A scrap dated 1937 from The Argus newspaper found amongst the ceiling insulation.
The original ceiling insulation had compacted and been displaced in many areas.
Earthwool batts installed over Bedroom 2.
Earthwool batts installed over Bedroom 3.
West end gable and ceiling before treatment.
West end ceiling and gable covered in Earthwool and perforated reflective foil.
West end ceiling with second layer of mostly Shubbs batts laid across rafters.
East end ceiling covered in a second layer Earthwool and polyester batts.
Hayden filling the South wall cavity with granulated rockwool. He holds the hose and a remote control for the pump.
To access the top of the cavity in the East wall required entry through the roof space.
Access to the top of the cavity for the West wall also required entry through the roof space.
Nearer ground level, access for insulation was gained by cutting out bricks.
Granulated rockwool was pumped into the cavity through the space made by removing a brick.
Colour-matched mortar was placed in position for the replacement brick.
Bricks replaced - a week later.
