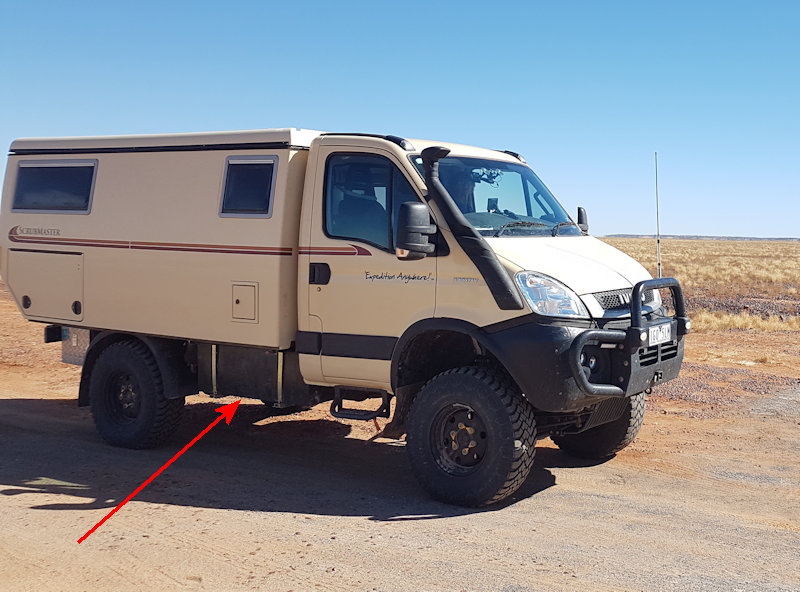
 The auxiliary fuel tank is painted black.
The auxiliary fuel tank holds approx 160 litres although due to weight considerations it is best to limit this to about 100 litres. The tank needs to be kept black, painted with bitumastic paint, to stop sunlight causing algal growth in the fuel if there is any water present.
The Camper Display Panel shows the fuel level in the tank. However this display can be wildly wrong! The level is measured by timing the return of an acoustic ping from a transmitter at the top of the tank. But the tank, made of polypropylene, distorts and so the acoustic signal oftentimes does not bounce back to the sensor, causing an erroneous reading.
More reliable is to look at the fuel level visible in the unpainted vertical strip at the back of the auxiliary tank.
Fuel can be transferred from the auxiliary to the main tank. Touch the button on the dash CAN-bus switch bank at any time to transfer about 5 litres. Touch either the 25 litre or 50 litre buttons on the Camper Touch Screen when at rest to transfer — the transfer will stop if the engine is started. The transfer pump can run dry: the sound it makes becomes more rattly.
Issues and Modifications
Replacement Tank
In June 2016 (at approx 25,000 km odo), a month out in the Flinders Ranges of South Australia on a very long trip, I noticed diesel dripping fast from near the front of the auxiliary fuel tank which was full. Fortunately the main tank was nearly empty so I was able to pump out almost half the fuel from the auxiliary. This slowed the leak a lot, to about one or two drips per second. When in mobile phone range, discussion with TravelTrucks suggested that an internal baffle had broken away due to travel on the rough "roads". This had happened to one or two other tanks and had been fixed in later models. They sent a replacement tank, supplied under warranty, to Alice Springs for fitment by AirPower, at the time the nearest Iveco agent. However, I had to pay for the fitting.
The AirPower technicians took all day and it cost me over $1000 (It took me less than half a day to do the much the same job (see below).). Inspection showed that they had left one crucial support bracket bolt loose, had plumbed the pump in back to front so it blew rather than sucked, and had badly crimped the vent hose for the water tank. Some considerable time later I found that the rear strap had come undone, possibly contributing to cracking of the support brackets (see below). I am thankful I don't have to deal with these people again!
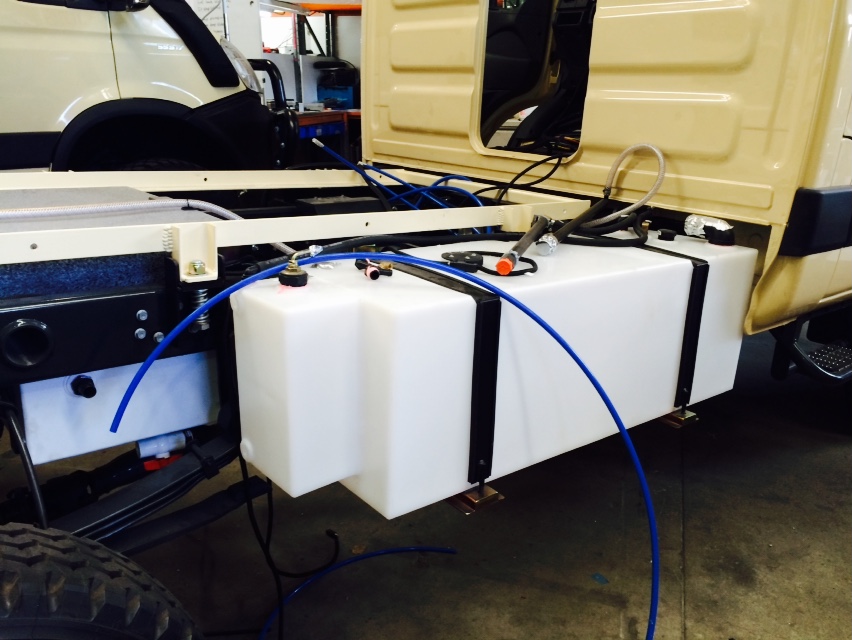 The orginal auxiliary tank with outboard heater tank.
One positive is that the supplied replacement tank did not have an outboard 5 litre tank for the Camper's diesel heater. And fitting the takeup tube into the replacement tank would not work because the tube had been cut short for the smaller tank. The happy solution was to supply the diesel for the heater from a T in the main fuel line immediately after the fuel pre-filter. Now the heater fuel is never stale, its level never has to be checked, and the heater uses so little diesel that vehicle operation is not jeopardised.
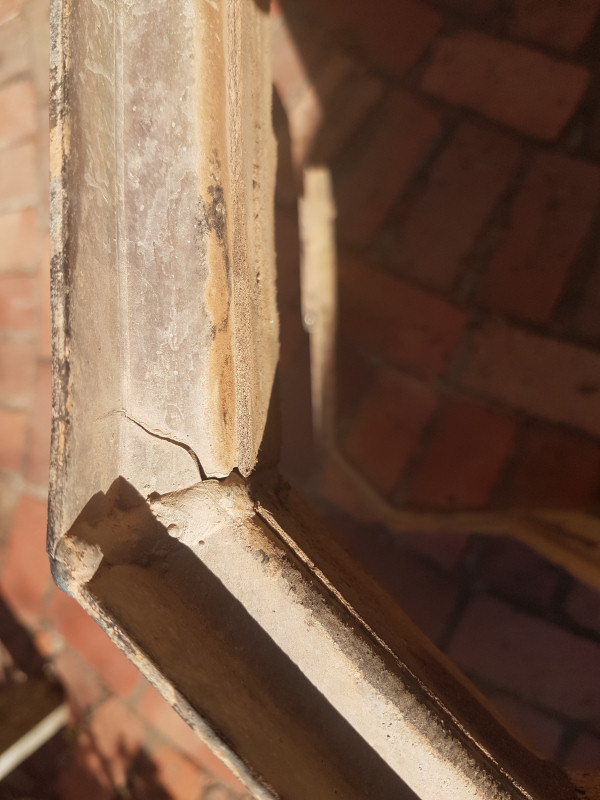
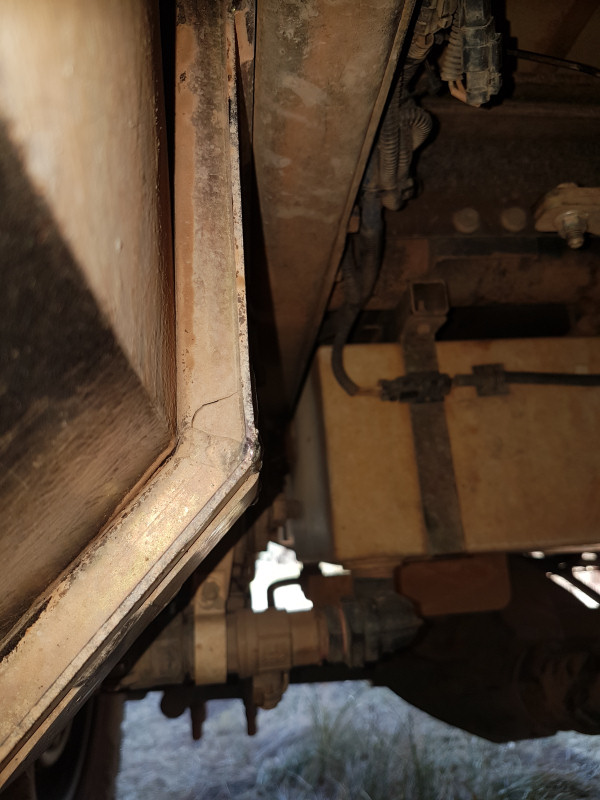
Cracked Support Brackets
At around 56,000 km I noticed that the rear strap had come undone some time earlier. Inspection showed that each of the two support brackets was cracked in both webs. This with over 100 litres of diesel on board! Replacing the missing nut on the strap was not so easy; cautious driving for the next 800 km got us home without mishap.
The fix was to either have gussets welded in place on the brackets (a really bodgy idea), or buy improved support brackets and straps from TravelTrucks. Because of some other failures (!) they now have them made from 3 mm steel rather than the original 2 mm steel.
It was a bit of a trial first removing the original brackets and tank and then fitting the new brackets and the tank. The tank has changed shape over time and this caused all manner of problems. I must have tightened and loosened the brackets three time to get the tank back in. And the straps! I had to make a lever and blocks to get them into place with the tank resisting all the time. Nevertheless the job took only about 5 hours, a few hours less than it took the clowns in Alice Springs, even including fixing up a crimped breather hose, rerouting the cable to the fuel level sensor in a sensible way, and recoating bitumen paint lost during the installation of the tank.
The strap bolts are now held on with double nylock nuts.
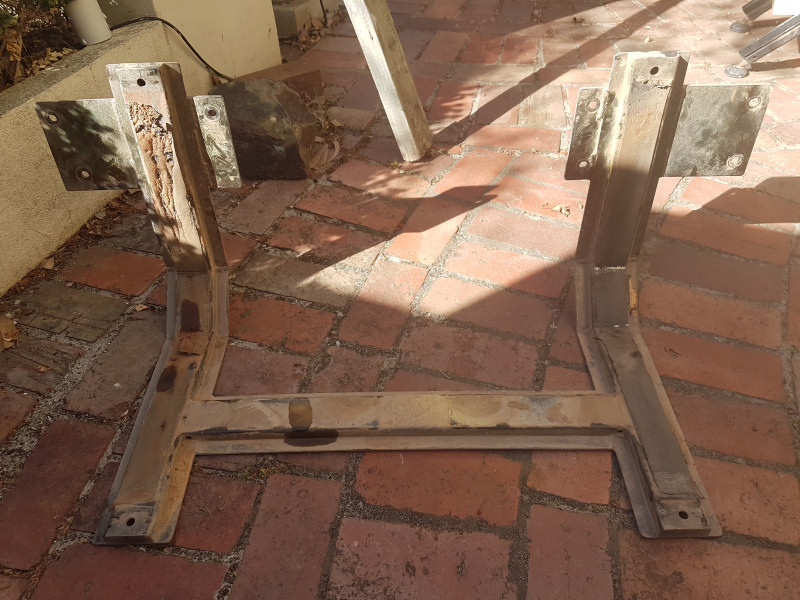
The old, cracked, brackets out.

The new, thicker, brackets ready for installation.

Auxiliary tank back in with two straps bolted to the brackets.
Fuel Supply Point
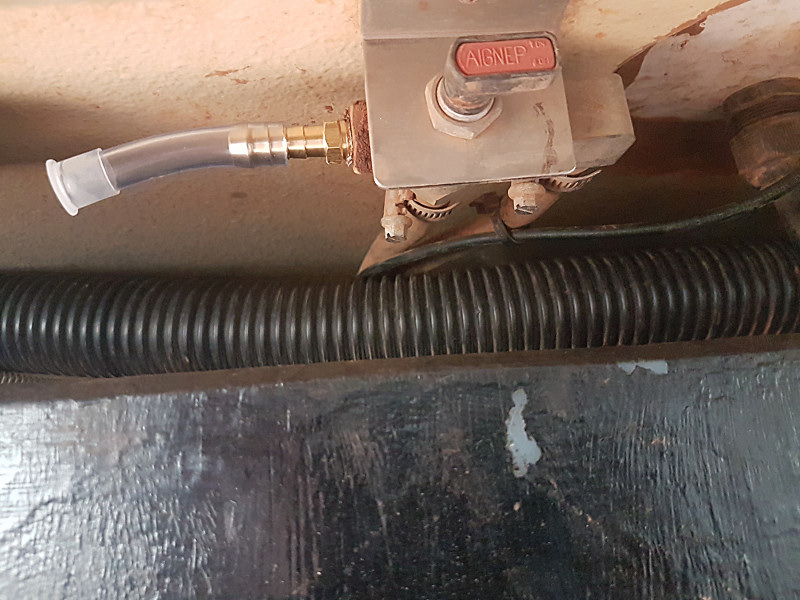
The diesel heater is now supplied from the main
fuel line. The changeover tap above the auxiliary tank used to allow the auxiliary pump
to send fuel to the main tank or to the outboard tank for the heater. Now it continues
to supply the main tank and alternatively to a barb to which a hose can be fitted to fill
a container. The photo shows the tap and barb fitted with a capped tube to keep dust out.
Could be handy some time.
Support Brackets — AGAIN!
Half way into our 29,900 km trip in 2018 I noticed that the front bracket holding the auxiliary fuel tank had broken. I installed a ratchet strap to help hold it together and kept on, only putting 30 litres into the tank for emergencies. This also happened with my first bracket two years prior (see above) with a bracket made of thinner steel (2mm instead of 3mm).
Here are some photos of the bracket. With the tank out, you can see that the rear bracket has also failed at the same place. It has been notched and welded and it is the welds that have failed.
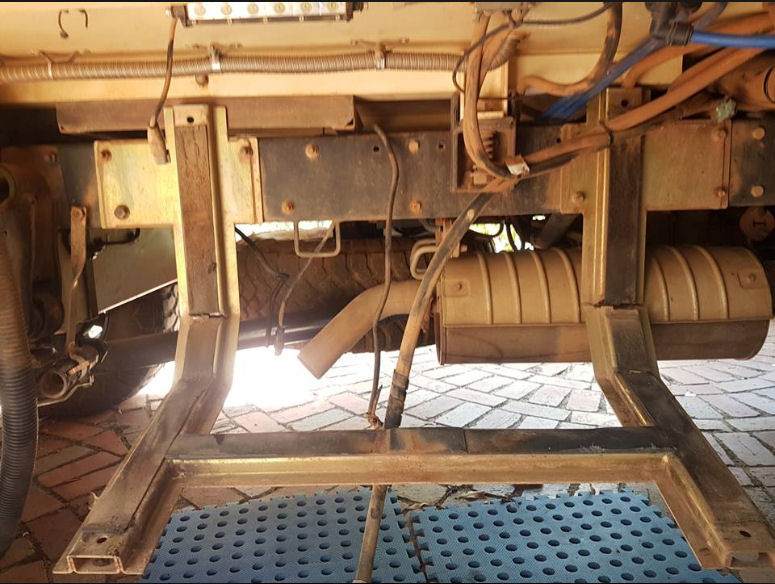
This bracket failed the same way as before. The design is not fit for purpose.
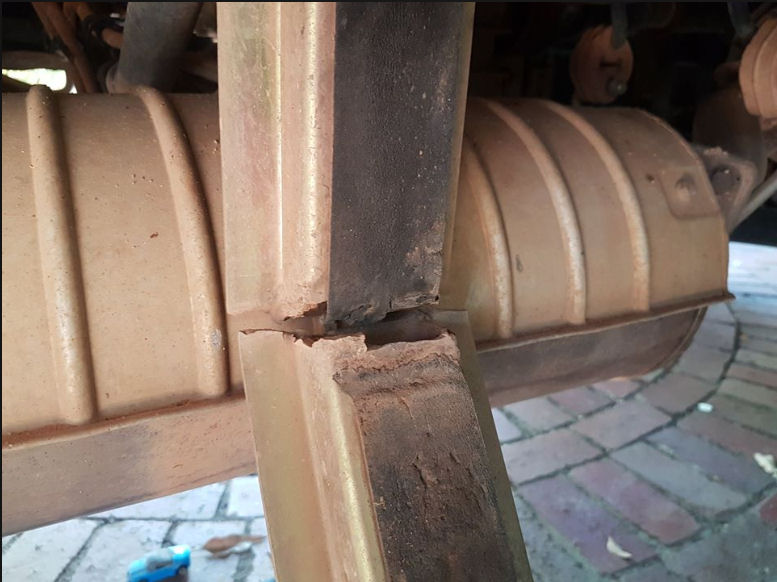
The front web really let go, breaking through the welds.
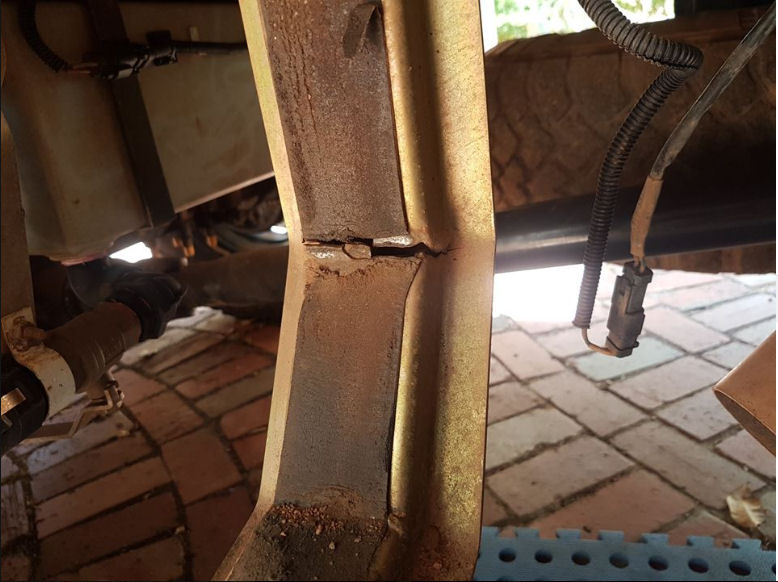
The rear web also failed, again the welds failed.
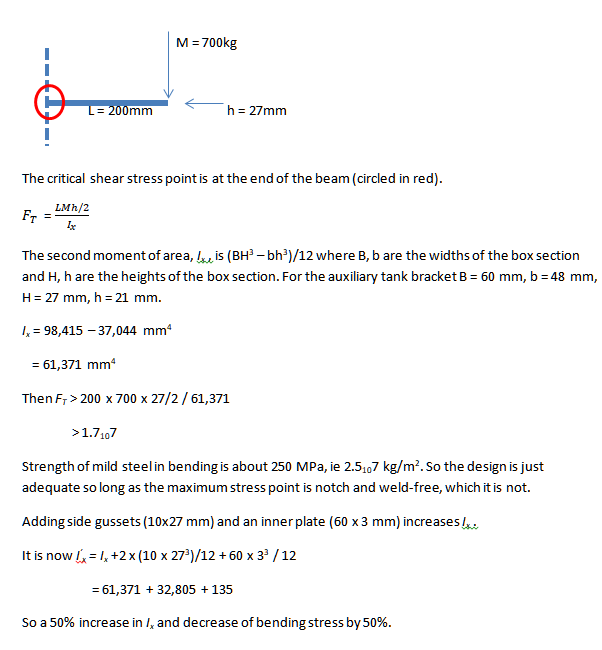
It was interesting to calculate what thickness of metal would be required to make the bracket serviceable. If I treat the geometry as a cantilever beam half the width of the tank (ie 200mm) and loaded with half the filled weight of the tank (ie 70kg) and approximate the beam to be a hollow box section (60mm x 27mm outside, 48mm x 21mm inside) then I estimate that the maximum bending stress in the beam does not exceed the yield strength of mild steel unless forces due to corrugations, bumps etc are greater than 10 x the filled weight. Dynamic loads up to around 15 x are possible but 10 x is a good working margin. So the bracket would have been good but for the notching and welding in this most critical of bends in the bracket.
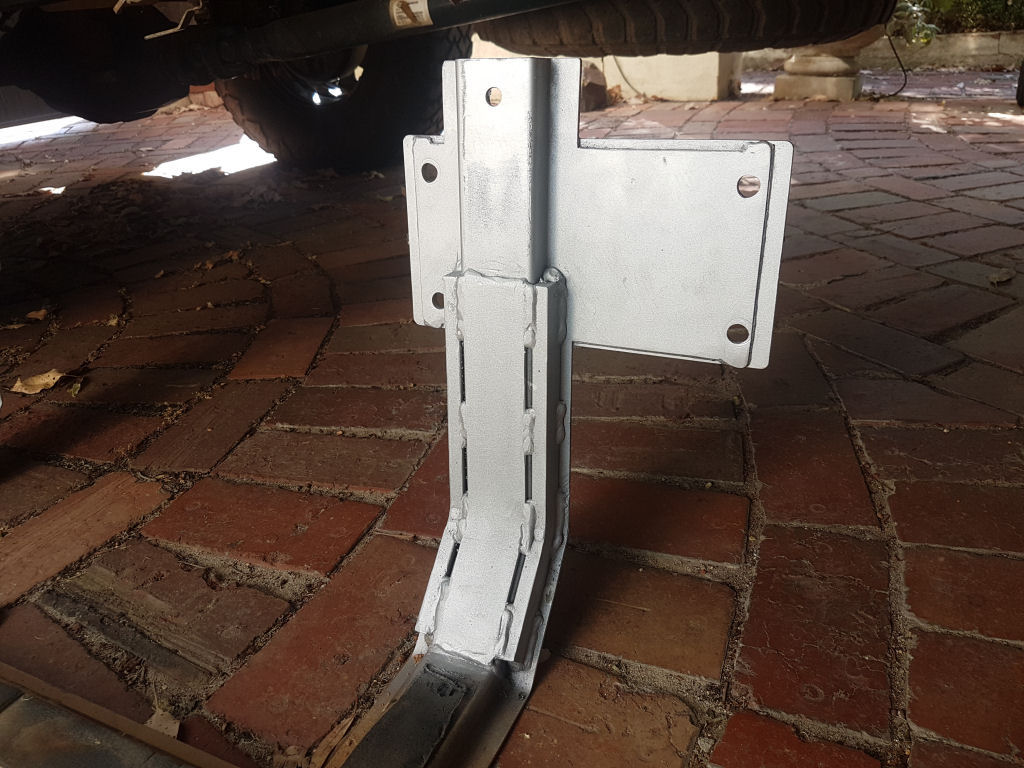
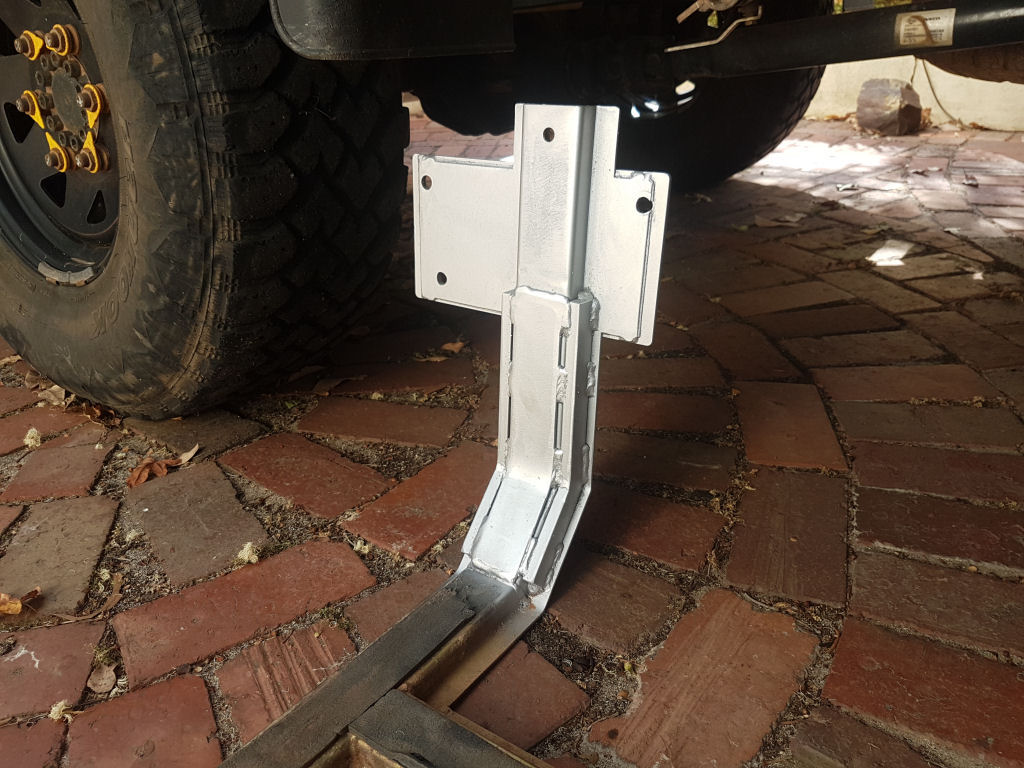
For the princely sum of $40 my local gate manufacturer welded up the brackets and added side gussets made from 27 x 10 mm solid steel and an inner plate made from 3 x 60 mm steel. The inner plate replaces the foam rubber padding material. The result is, according to my calculations, 50% stronger than if the original bracket had been simply bent rather than notched and welded at the critical corner.
The reinforced bracket is likely MUCH stronger than the original with its notch and weld.
Calculations
LINKS
