Alternator Control
The vehicle alternator charges the starter battery; it is rated at 180A. It can be used to also charge the camper battery.
BEP Cluster
A cluster of BEP switches behind and below the passenger seat manages the loads on the starter battery and camper battery.
The cluster is wired per the BEP recommendation, with starter battery isolation, camper battery isolation, emergency parallel isolation, and DVSR (Digital Voltage Sensitive Relay) which can be set to charge the camper battery once the starter battery voltage rises above 13.4 V.
The starter battery isolation switch should be used whenever the Scrubmaster is to be left for a month or more. The at-rest loads are small but they can cause a problem over time. My practice is to use the switch and clip a small (less than 20Wp) solar panel direct to the starter battery. Beware that what appears to be a good connection point for the solar panel (ie somewhere on the battery fuse plate) is in fact also isolated!
Since the at-rest loads on the camper battery are significant (100s of mA or more) the camper battery isolation switch should be employed whenever the Scrubmaster is to be left unattended for more than a few days; although if solar charging can occur this may not be necessary. There are always loads on the camper battery and these can over time discharge the battery so much as to send it to sleep.
The yellow Emergency Parallel Isolation switch should only be used with care. It can be set ON (but never left ON) when
- the starter battery is low and needs to be boosted by the Camper battery
- the Camper battery is low and the expected charge current from the alternator is not excessive (not greater than say 150A)
- the winch, which draws its power from the Camper battery, is used extensively and needs extra power from the alternator.
Alternator Charging of the Camper Battery
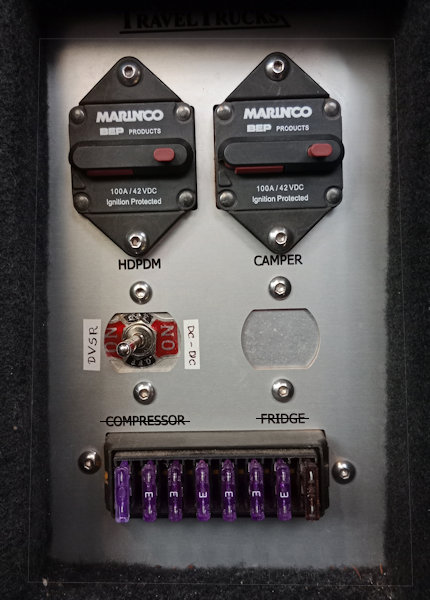
Selector switch behind the passenger seat: DVSR or DC-DC alternator charging.
If the camper battery is near-flat, the charging currents can be huge. Care is required to not overload the alternator nor the wiring.
- The safest way to charge the camper battery is to select DC-DC charging with the switch on the panel behind the passenger seat. The charger can be set to either 30A or 60A charging. Note in hot weather the charger may overheat on the 60A setting – a red LED will light up and steps must be taken to clear the fault. DC-DC charging is the only safe way to charge a flat or near-flat camper battery - it will wake up an apparently flat battery and then charge it.
- Selecting DVSR charging can be faster at first, but the charge current will decrease fairly quickly as the camper battery voltage rises. There is also the possibility of overloading the DVSR, since it is limited to 125A and such a current is all too easily possible when the camper battery voltage is low.
- If the camper battery is no lower than say 30% state-of-charge then direct Emergency Parallel connect can be used. The current will be large at first. To allow the starter battery to charge properly this setting should not be used continuously (days at a time) nor when the engine is not running (unless the starter battery needs help for engine starting).
Modifications
Charging by DVSR
The original, OEM, setup was designed for AGM or wet cell batteries:
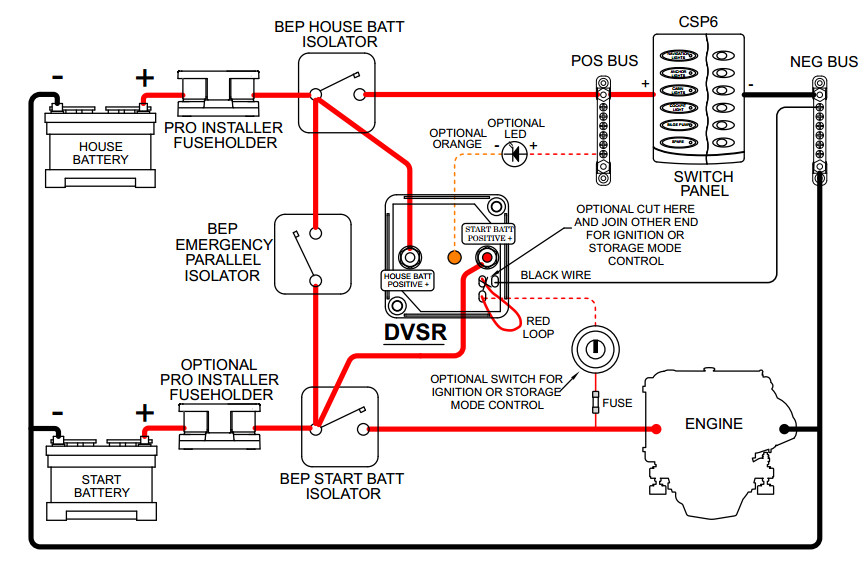
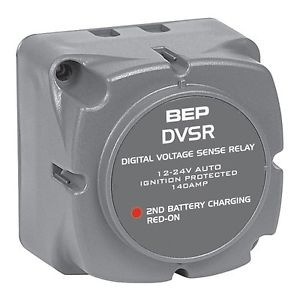
The BEP Digital Voltage Sensitive Relay (DVSR) needed to be modified to successfully charge the lithium camper battery.
Three issues arise with a lithium battery installed:
- The continuous alternator charge rate to the battery must not exceed 125A, the maximum for the DVSR. Relevant when low State of Charge of the lithium battery.
- The alternator charge needs to be stopped if the cell voltages or pack voltage exceed specified limits. This is handled internally by the camper battery management system (BMS).
- When the engine stops the DVSR will stay on so long as the start battery or the camper battery is above 13.4V. This is very likely for the lithium camper battery so it would then discharge into the start battery, an unnecessary and unwanted occurrence.
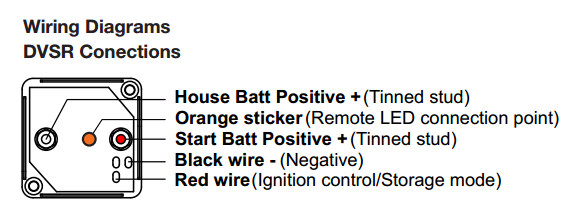
The DVSR has an optional setup that provides ignition control — the DVSR is ON only if the engine / alternator is running, i.e., if there is a +12V signal on the red wire at the (Ignition control/Storage mode) pad. This is what is neeed here.
I cut the red looped wire from the stud nearest Start Batt stud at the back of the DVSR and connected it to Pin 8, the "Alternator Operation" pin, on the 20-pin Body Builders' Plug using one of the "SP" spare white wires that run between the area of the Body Builders' Plug and the area of the DVSR behind the passenger seat, put in by Travel Trucks.
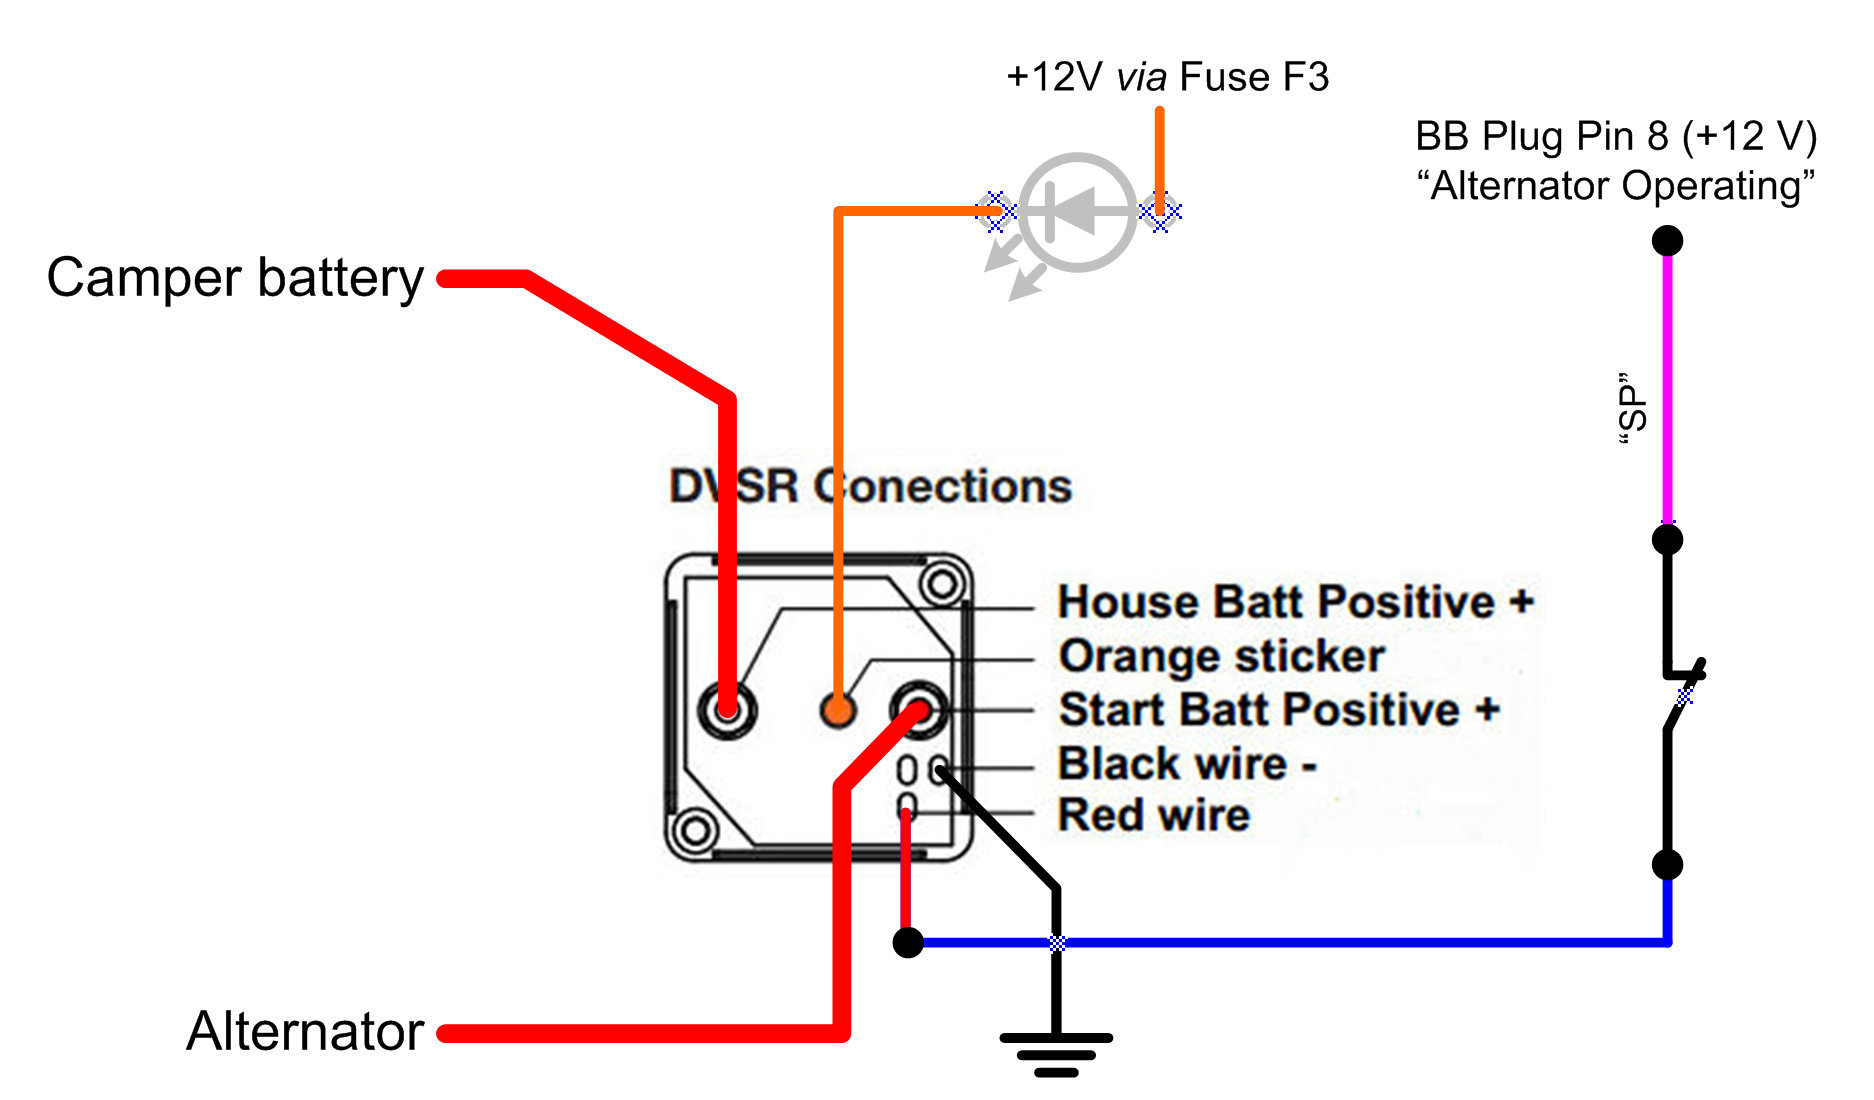
Wiring to control the DVSR.
While amongst the wiring, I connected the orange wire (joined to the orange sticker on the back of the DVSR) to a remote LED next to the relay to show DVSR in operation. The LED receives power from a spare fuse, Fuse F3 (3 Amp), behind the passenger seat.
Charging by DC-DC Charger
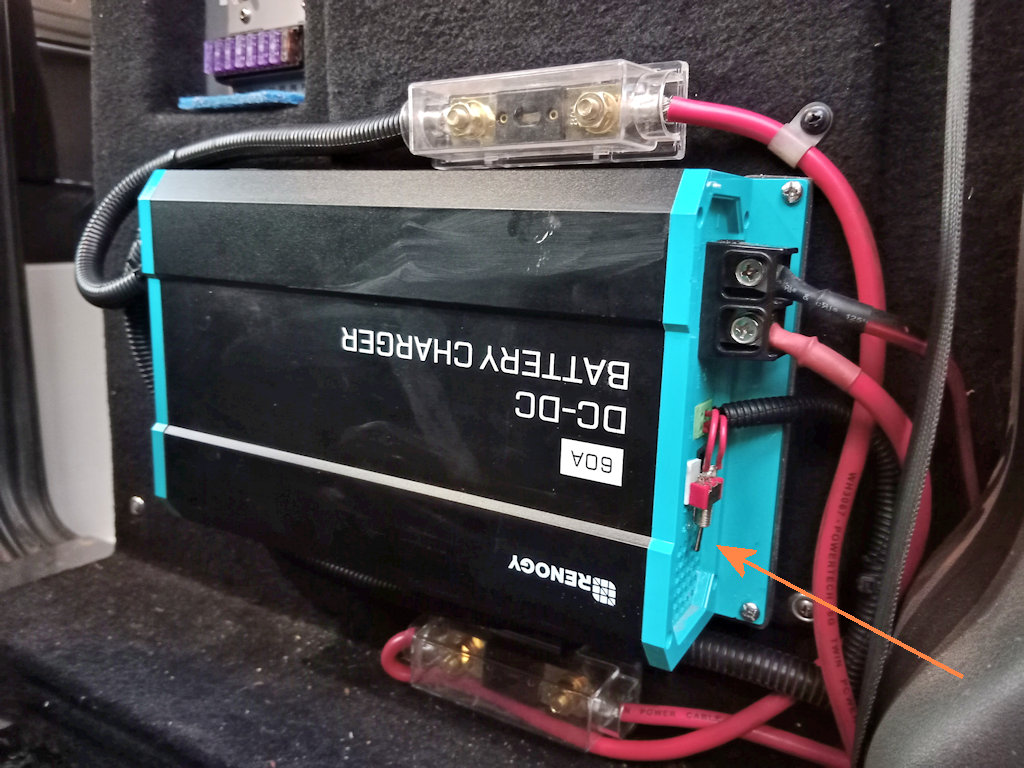
DC-DC Charger with 80A in-line fuses and (arrowed) charge rate selector switch.
A Renogy 12V 60A DC to DC Battery Charger has been installed behind the passenger seat. It is switch selectable between 30A and 60A charge rate at the LC terminal (+12V sets 30A rate). DIP Option switches are set to give a maximum charging voltage of 14.2V for the lithium camper battery – SW5=off SW4=on SW3=on SW1=on SW2=off.
The +ve cables have 80A in-line fuses and take power from the back of the BEP starter and camper battery isolator switches. The -ve cables connect to the vehicle chassis below the charger.
The DC-DC charger will only operate if there is a +12V signal on the D+ terminal. This is the same as required for the DVSR to operate and so a toggle switch selects between DC-DC charger and DVSR charging.
If the camper battery is over-discharged (flat) the protection circuit will turn the battery off and make it unusable. The Renogy DC-DC has a reactivation feature to awaken a sleeping lithium battery.
In operation in hot weather the Renogy charger output does not reach the claimed rates, and the body gets very hot on the 60A setting. The internal fans seem to cope insofar as the charger does not fault off. However the fans stop immediately the engine is turned off and apparently the heat in the charger builds up so that when restarting later on, the Red Fault Light is on and the charger fails to operate. The Renogy manual says for this fault that
The DC-DC is experiencing an internal short circuit due to an imbalance between its input and its output ciruits. Restart the DC-DC by disconnecting the input/output and then reconnecting it again.
Indeed, using the BEP starter and camper isolator switches to briefly first turn off the camper battery (be sure to turn off the solar panels while doing this) and then quickly (to retain dashboard settings) cycle the starter battery switch, does correct the fault. But a better solution would be to allow the internal cooling fans to continue to run until the temperature there drops sufficiently. A second-best solution is a small case fan with an independent switch mounted outside the DC-DC charger — leave the case fan running for several minutes after stopping to cool down the charger.
LINKS
